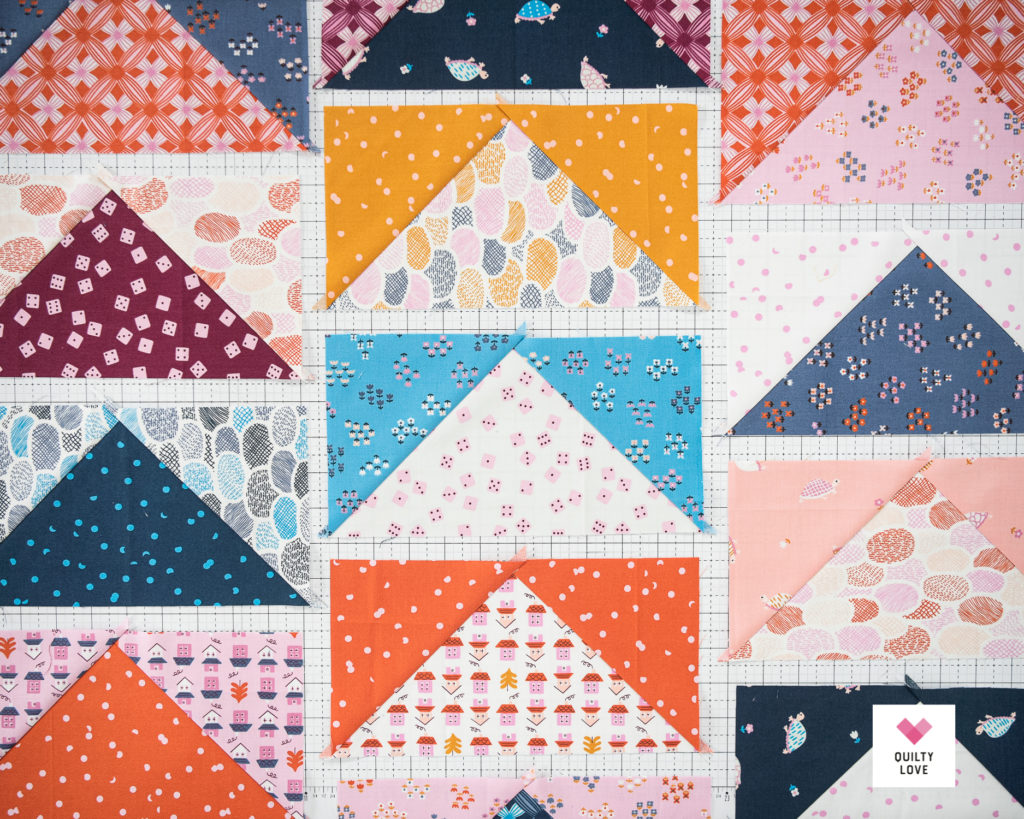
I have a four at a time flying geese tutorial to share with you today! If you have never tried flying geese four at a time, it’s pretty clever! When you make flying geese four at a time, they go together nice and fast and have no waste!
When you make flying geese one at a time you snowball the corners and end up discarding the cut off corner. Well guess what… with four a time flying geese, there are no discarded corners! There is absolutely no wasted fabric when making flying geese four at a time.
I like making flying geese four a time whenever possible since they do go together nice and fast and use up all of that fabric.
This post will walk you through making flying geese four at a time. Plus I’ll add some tips and tricks and directional print instructions.
Calculating Four at a time flying geese
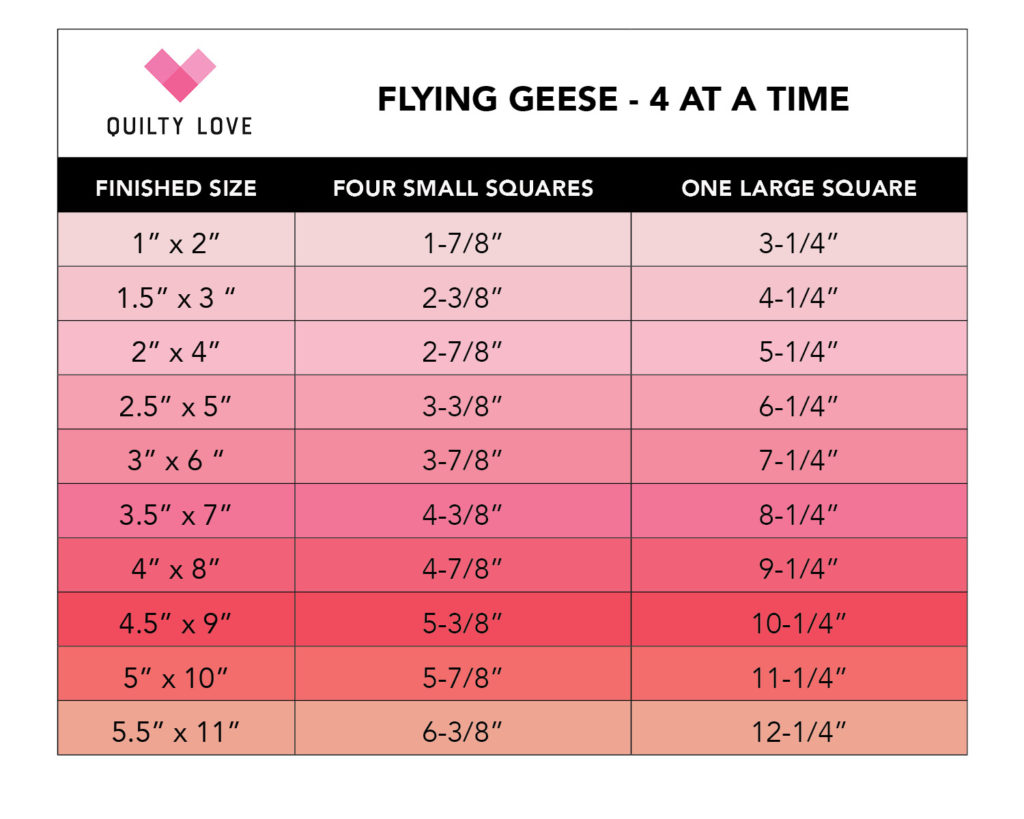
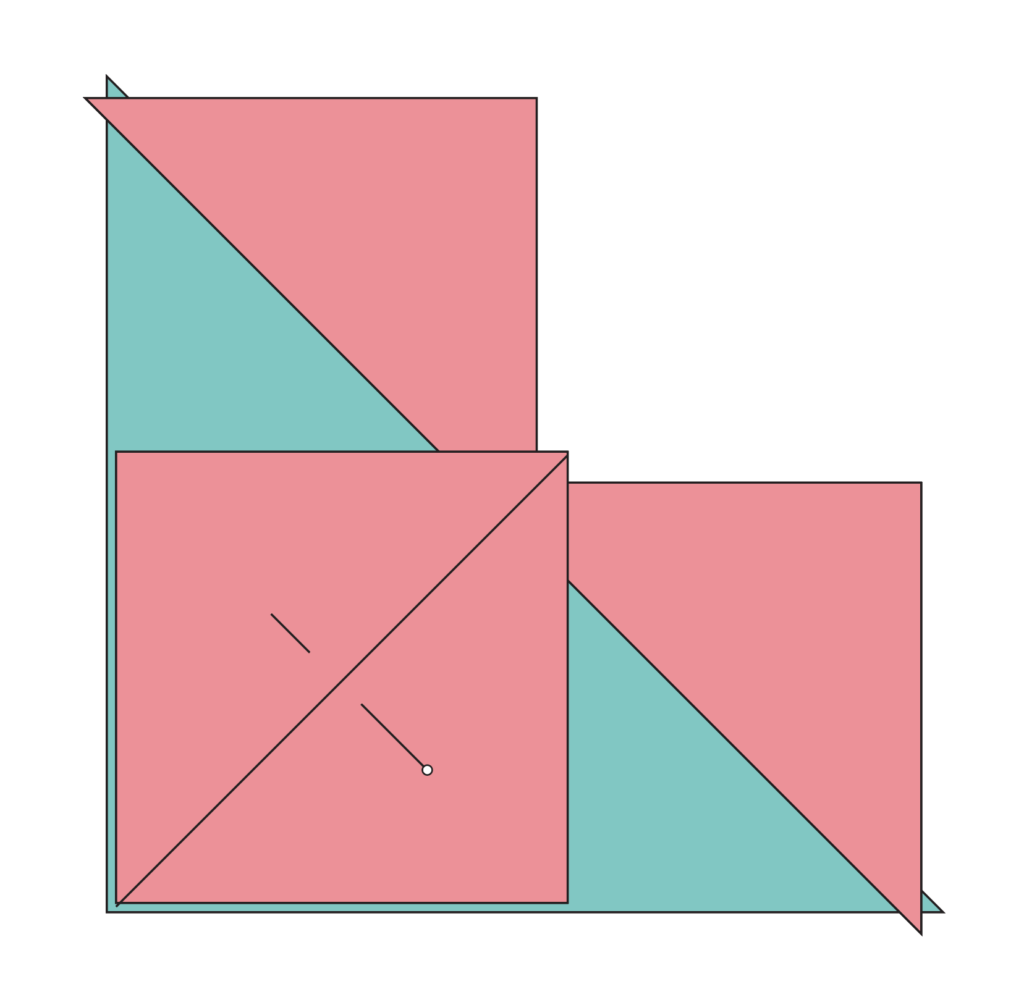
There is a simple way to calculate the squares needed for four at a time flying geese:
Add 1-1/4″ to the finished width [x1]
Add 7/8″ to the finished height [x4]
Flying geese are always twice as wide as they are high. So if you need a 2″ x 4″ finished flying geese then the math looks like this: 2″ + 7/8″ = 2-7/8″ (4 squares), 4″ + 1-1/4″ = 5-1/4″ (1 square)
The larger square is the “geese” and the smaller squares become the “sky” or the side triangles.
This calculation makes exact sizes. They should finish at the exact size and not need any trimming. (*should* being the key word. haha. See additional tips and tricks below!)
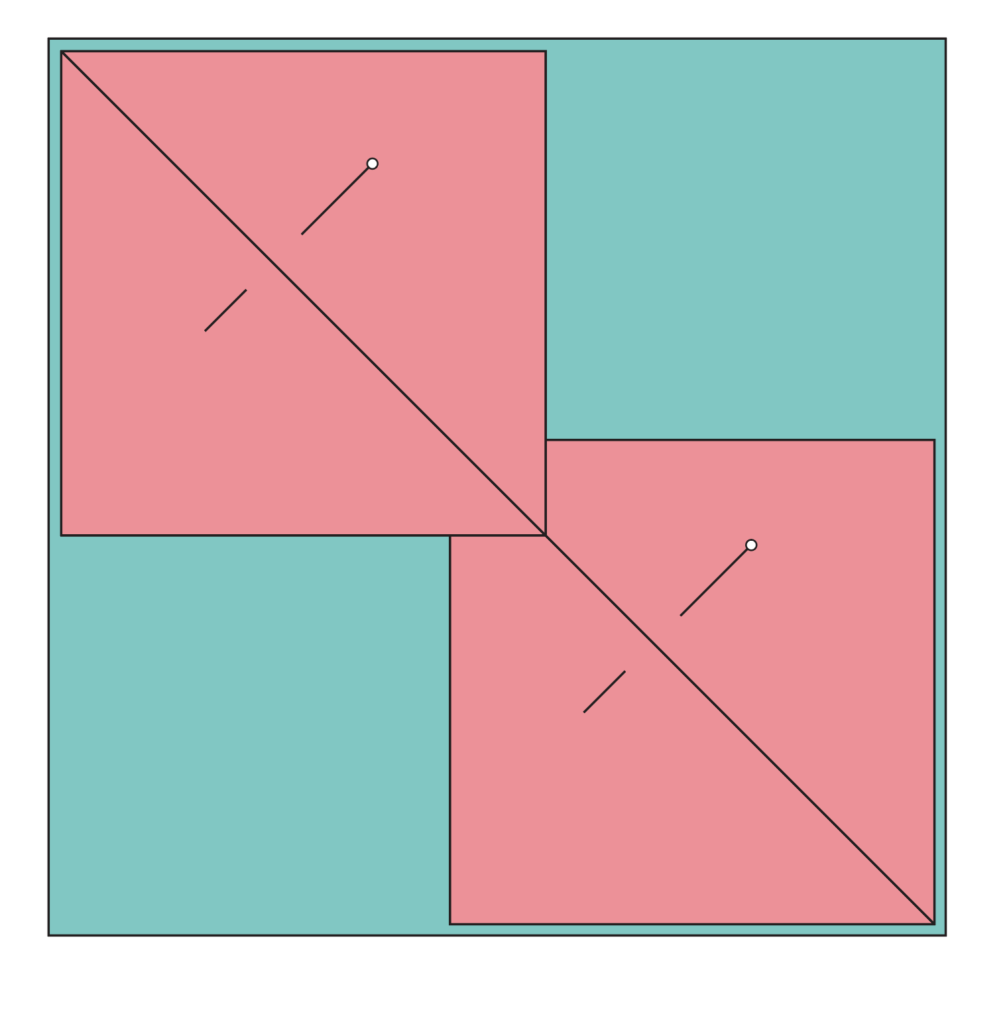
Four at a time flying geese chart
With four at time flying geese you will need one larger square and four smaller squares.
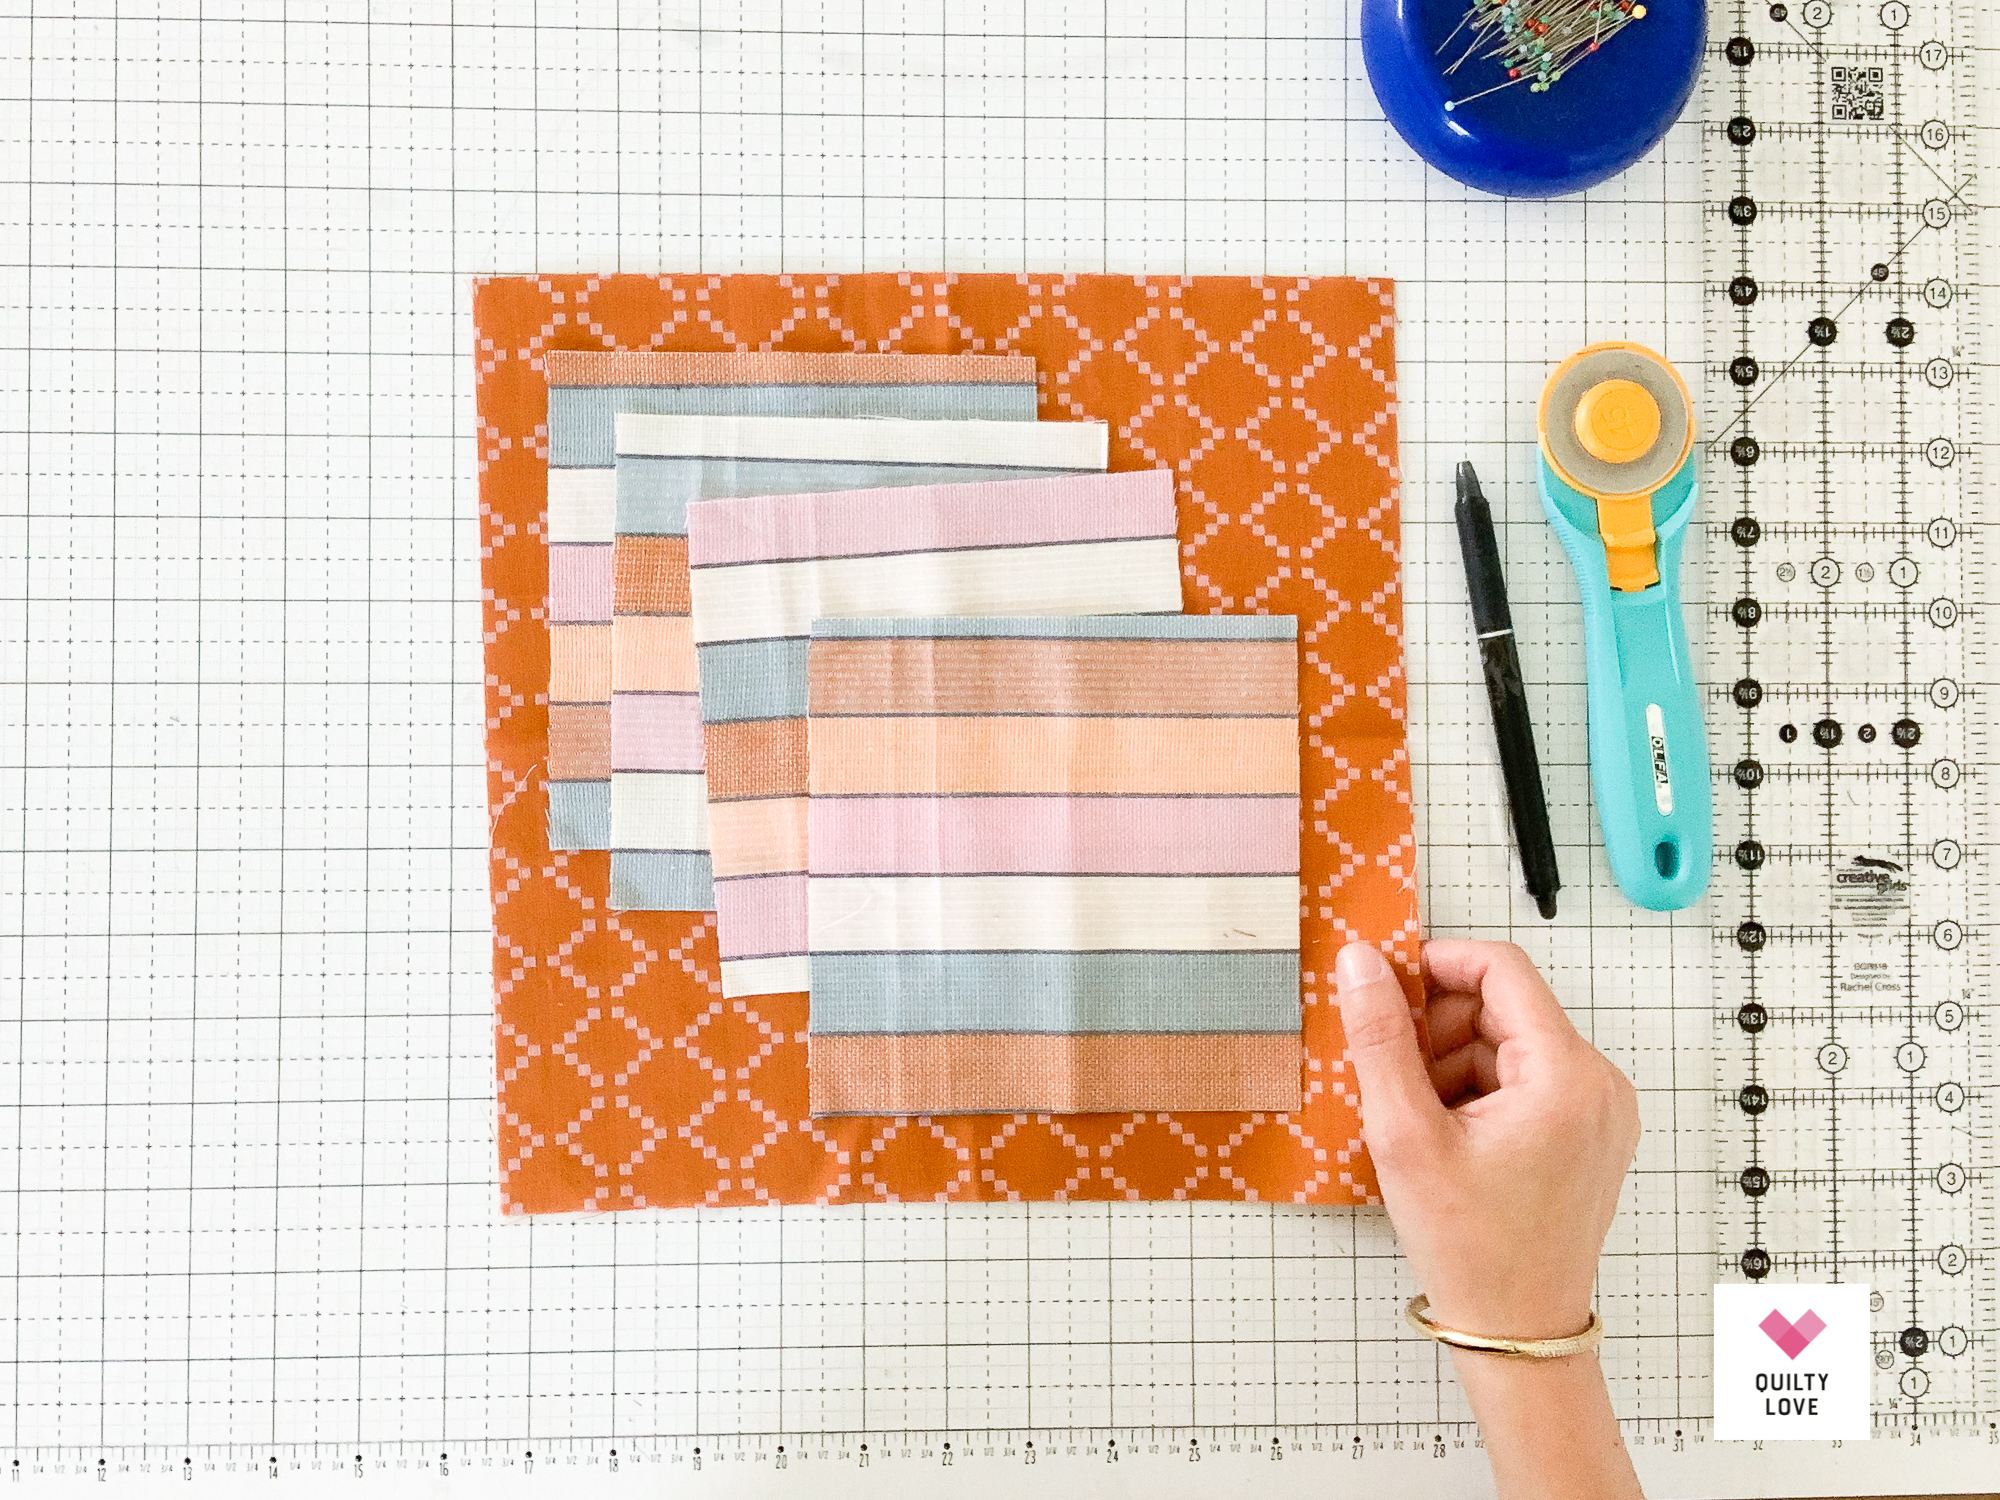
Step by step instructions for four at a time flying geese
- Gather your squares together. One large square plus four smaller squares.
Directional prints: Large square should be facing up. Small squares should also both be facing up. - Mark a line on the diagonal of the wrong side of two small squares (prints are facing up).
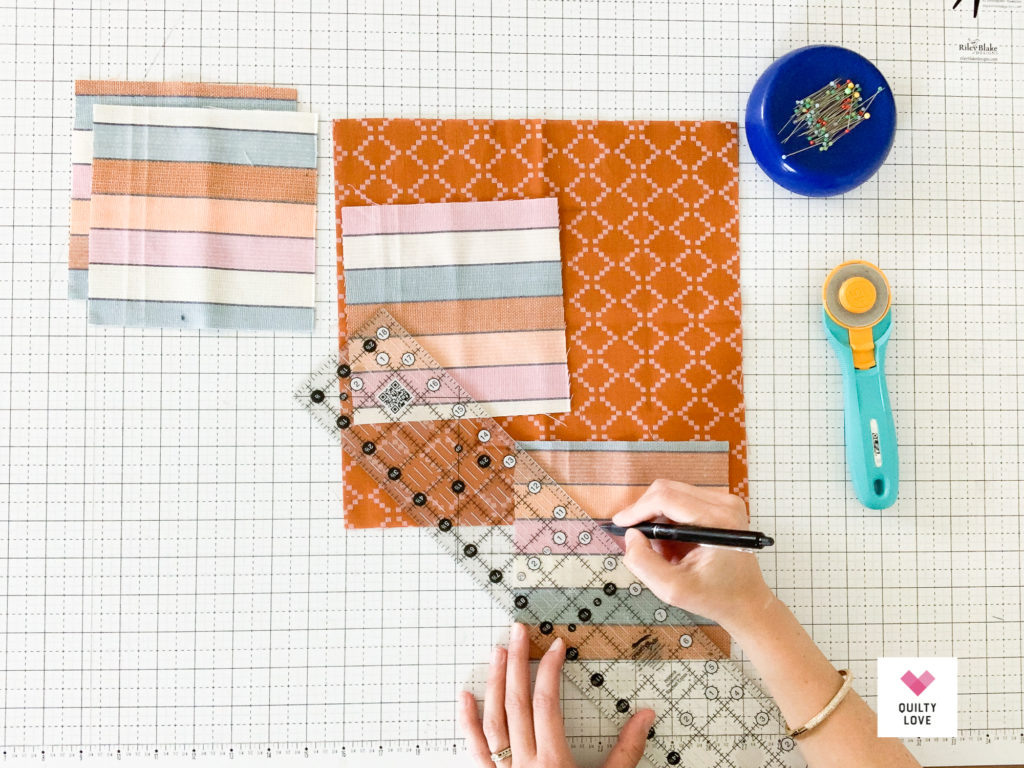
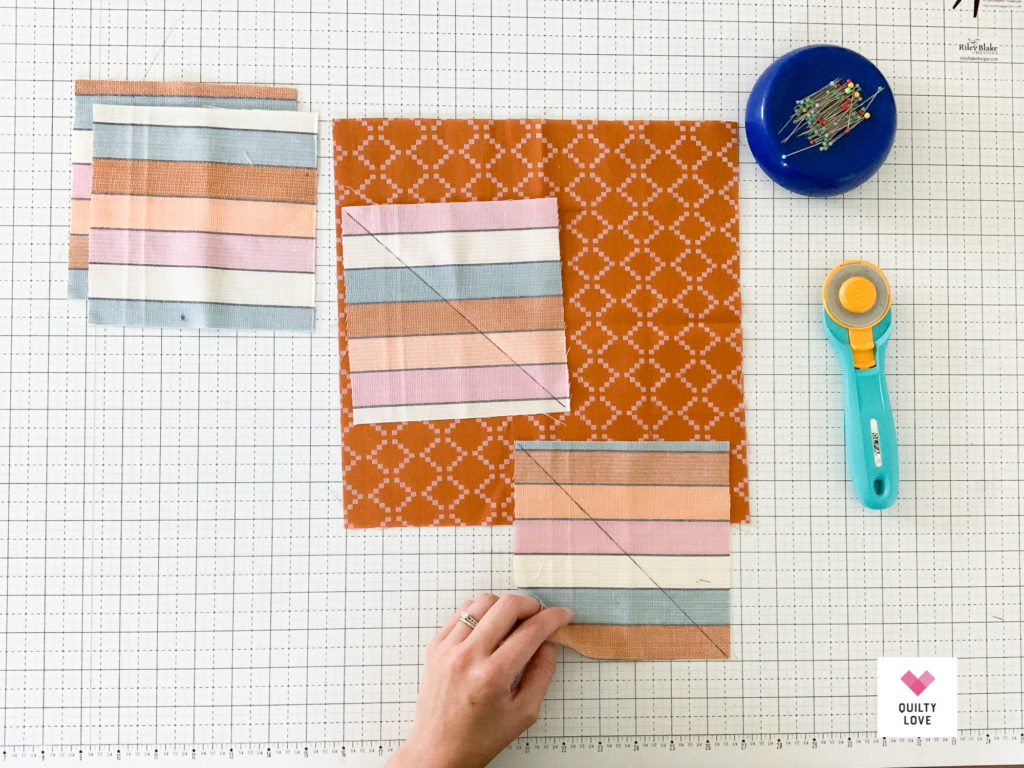
- Line the smaller squares up as shown below. The line should be perfectly straight. That ensures your corners are also lined up.
- Pin in place.
- Sew a scant 1/4″ on each side of the marked line.
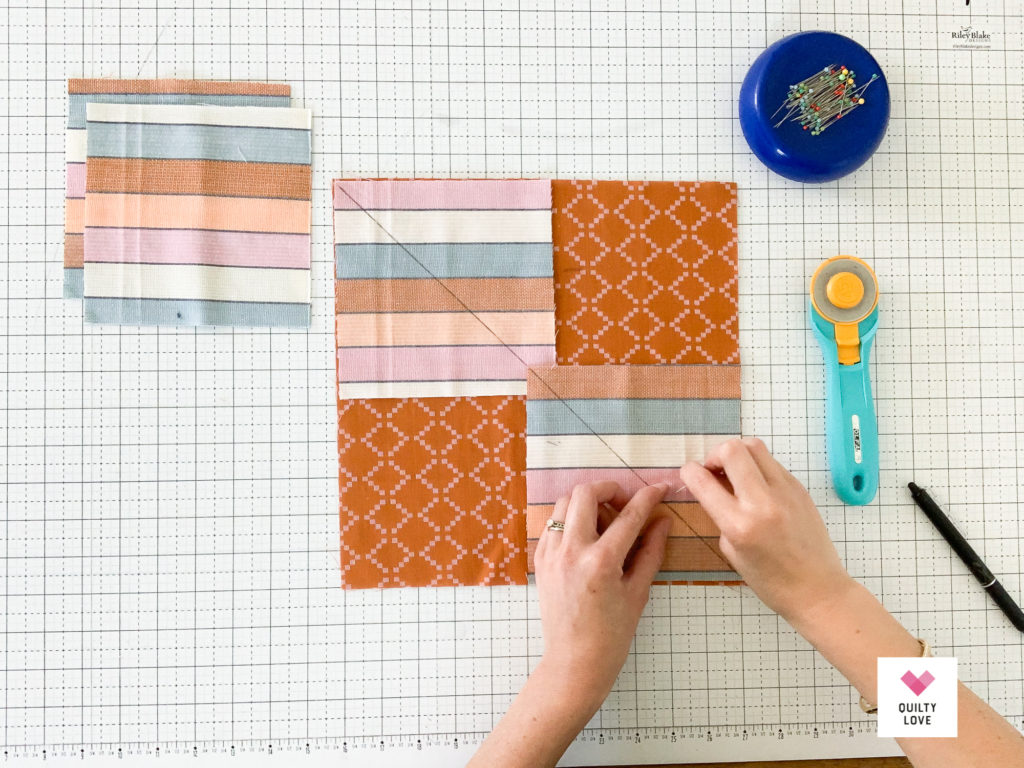
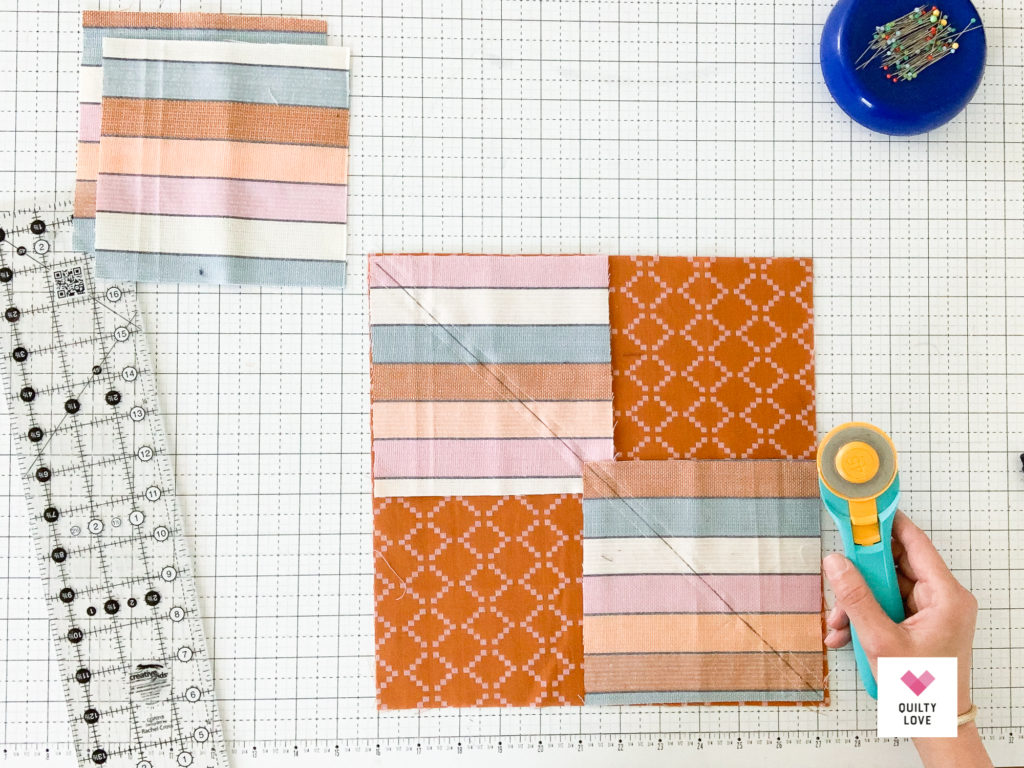
- Cut on the marked line using a rotary cutter.
- Flip corners open and press. You will end up with two heart shapes as shown.
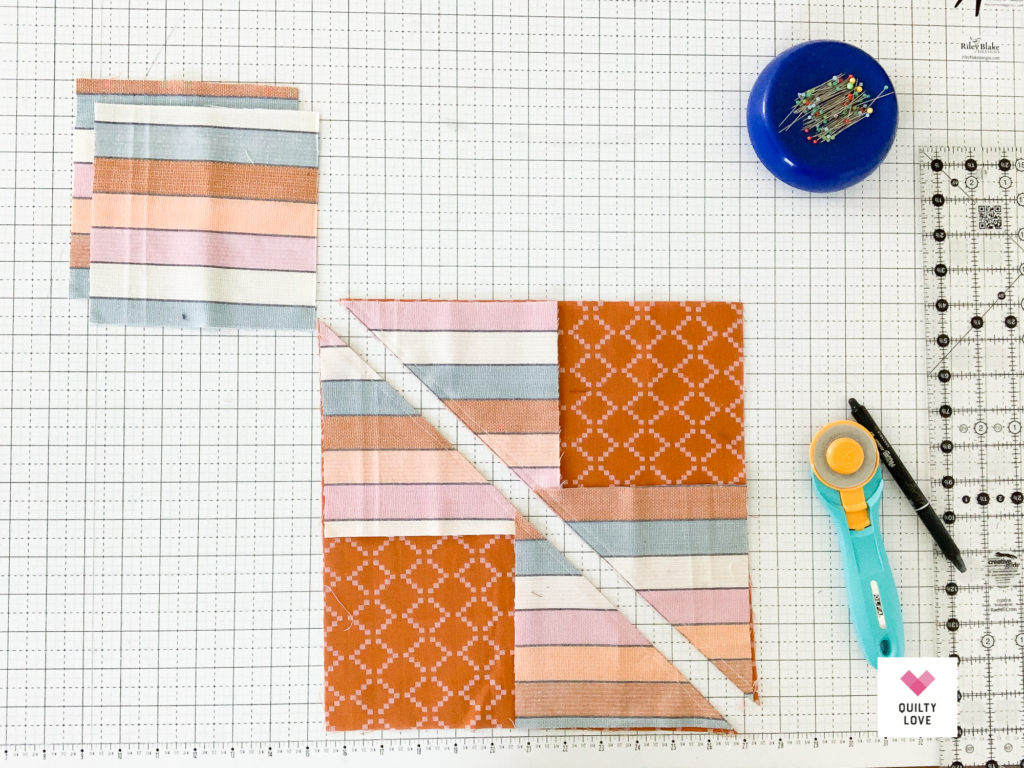
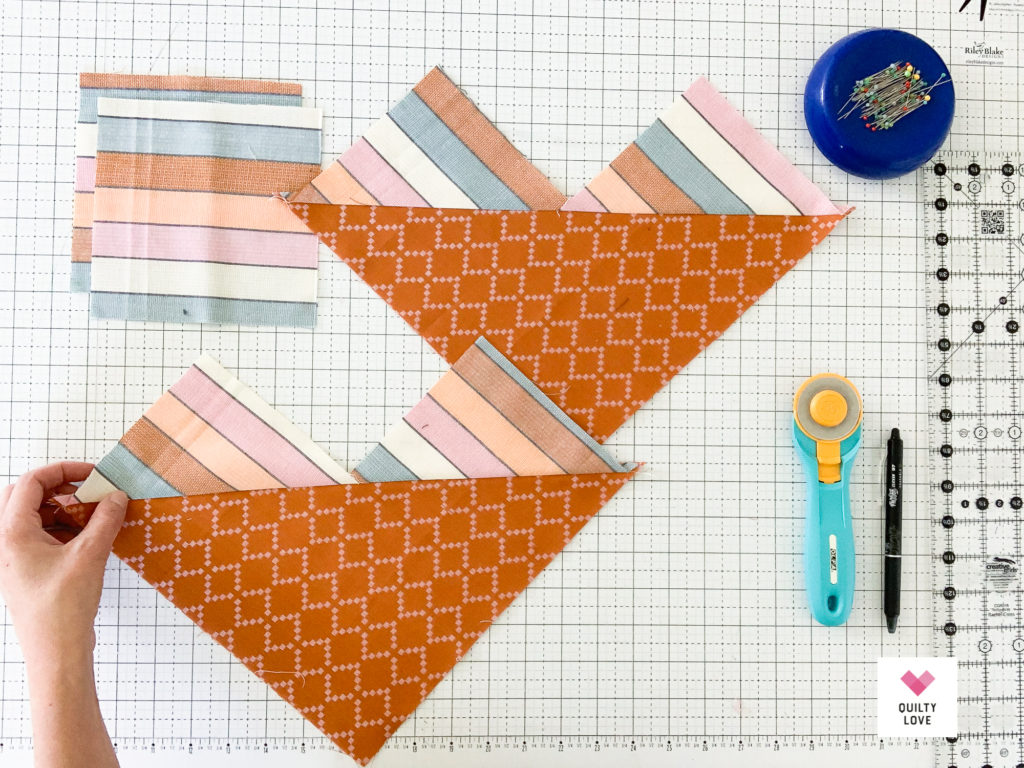
- Now it’s time to add the last two smaller squares. They will be placed sideways when using directional prints. You can make sure they are the correct direction by flipping open. Are your prints going in the same direction? (Like photo 2 below). If not, rotate 90 degrees. Check again.
- When your directional print is in the right direction, mark a line on the diagonal.
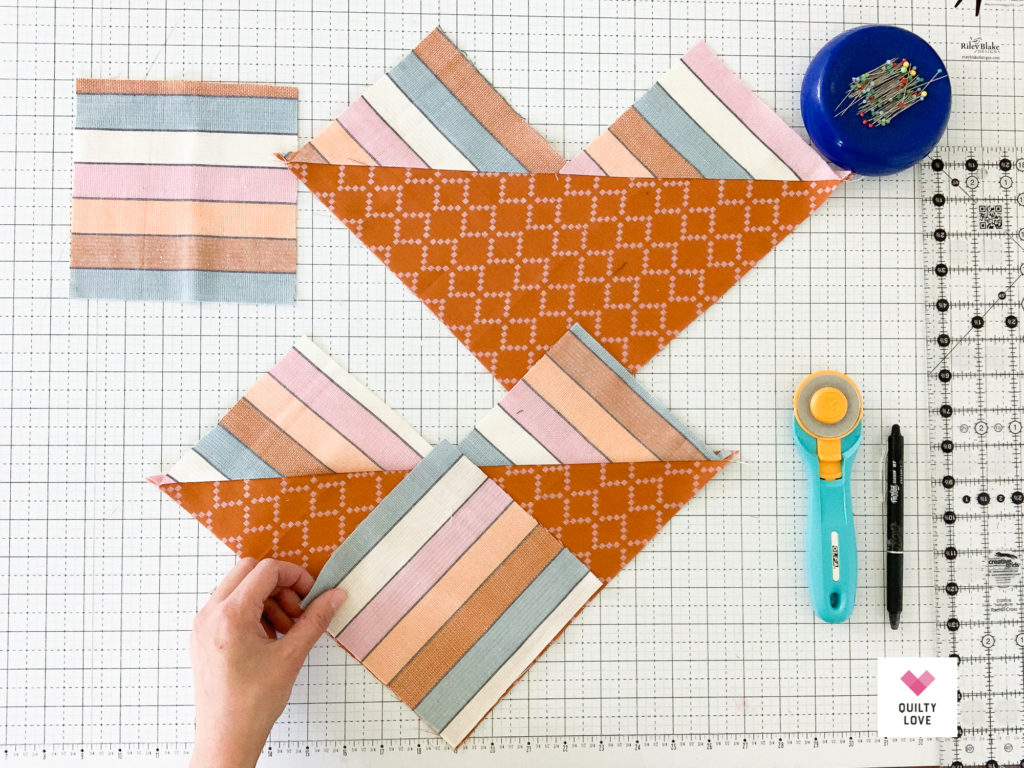
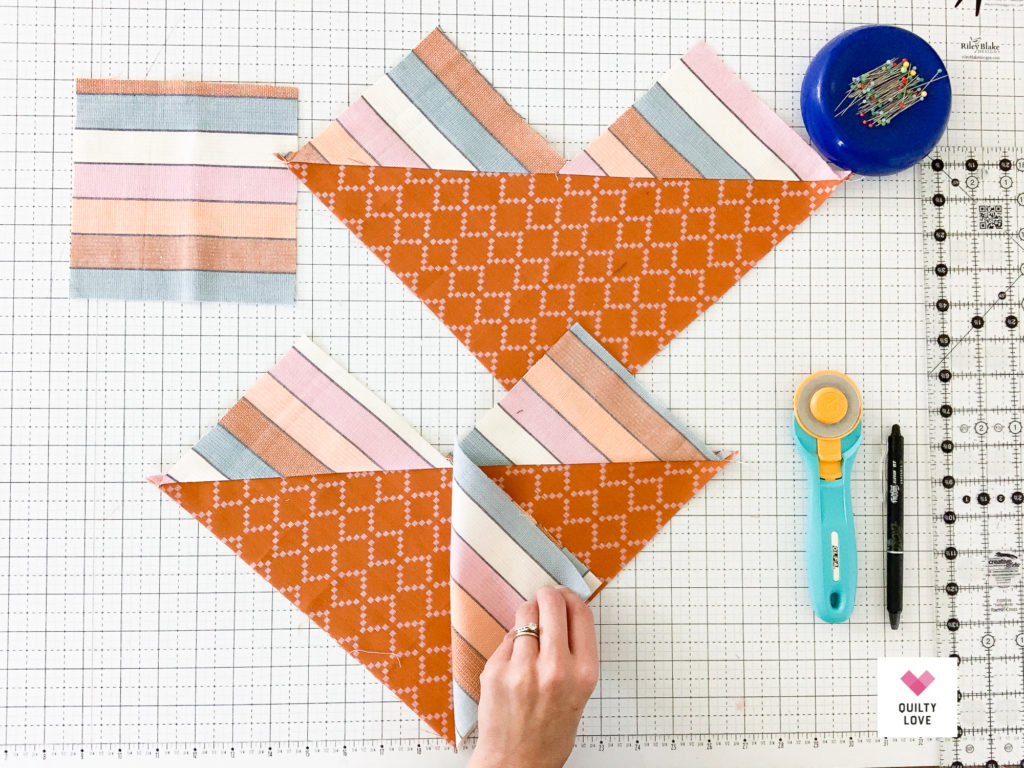
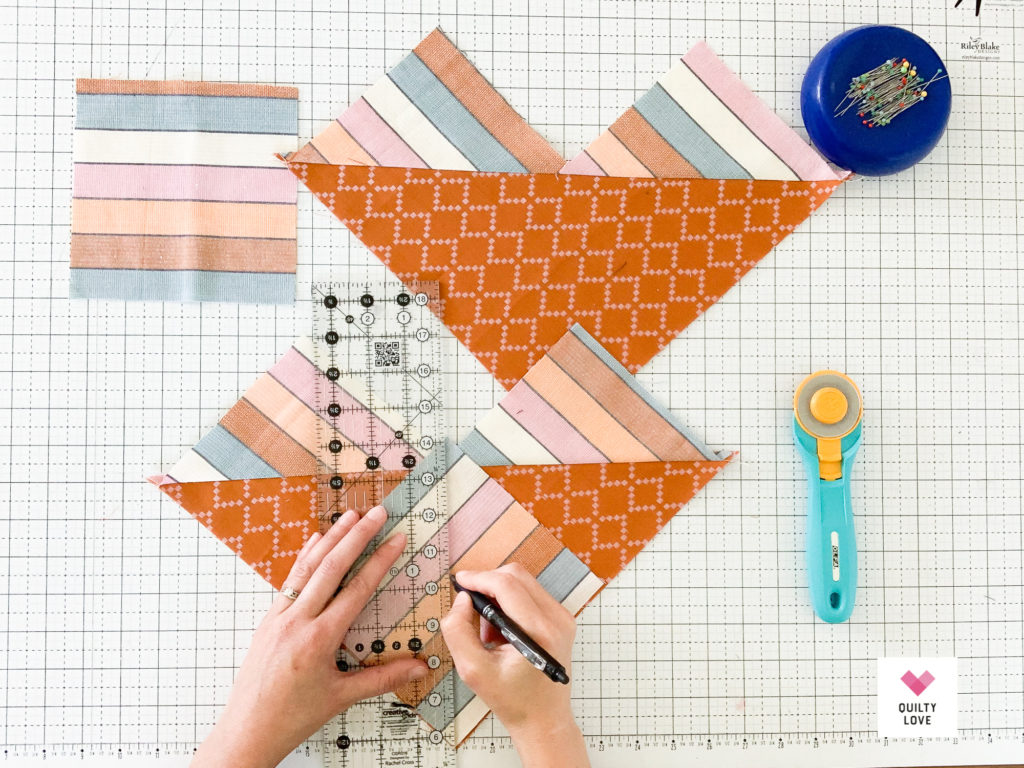
- Sew a scant 1/4″ on each side of the marked line.
- Cut on the marked line using a rotary cutter.
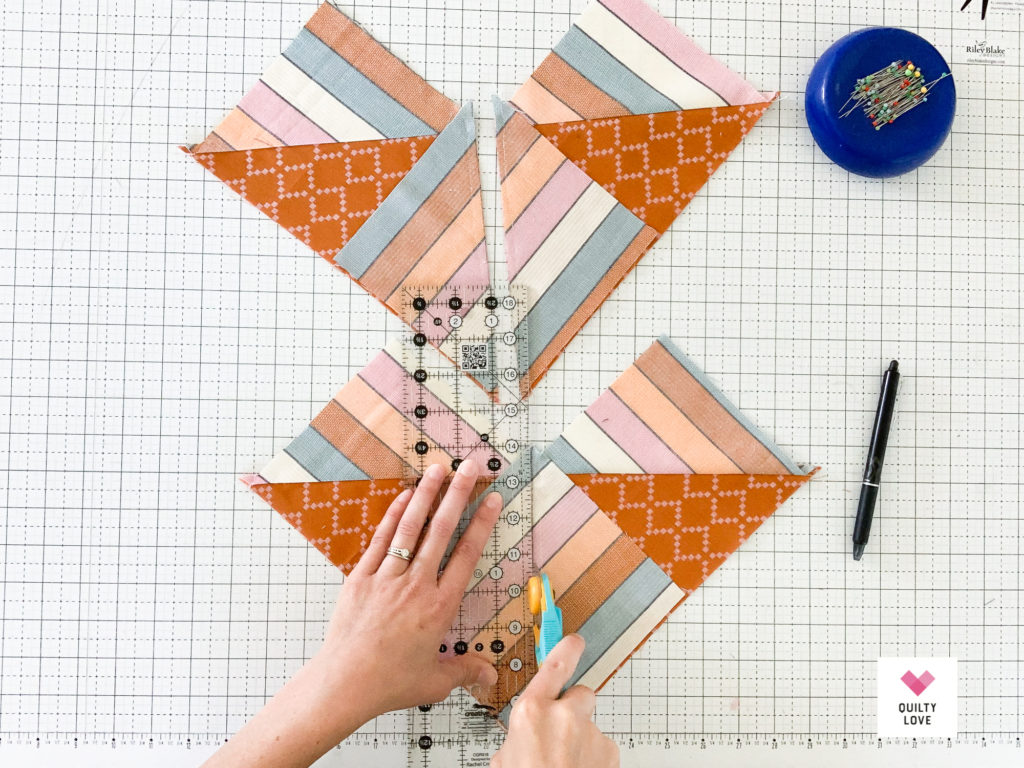
- Press corners open.
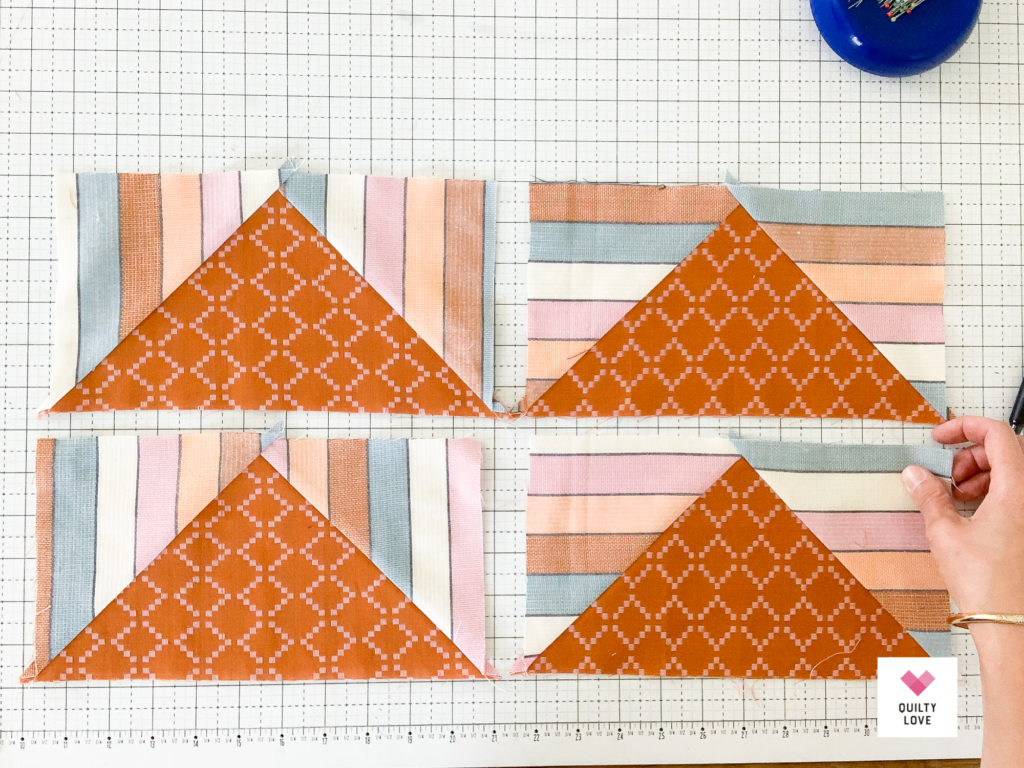
You now have four perfectly sized flying geese! (Well maybe. I never have perfectly sized flying geese…haha).
As you can see you will end up with your directional prints going in two different directions. If you are using a true directional print that is vertical your prints may end up sideways depending on the flying geese quilt pattern you are using.
Flying Geese four a time tips and tricks
Unless you have perfected your 1/4″ seam and are a perfectly precise cutter you may find your flying geese are not coming out to the exact size. Here are some tips and tricks for better four at a time flying geese:
- Use a scant 1/4″ seam allowance. A scant 1/4″ seam is a smidge under 1/4″. The scant 1/4″ seam is going to be crucial when making flying geese four at a time. A scant 1/4″ seam allows for a little extra room for thread thickness and flipping your corners open.
- Cut your squares a little bigger and then trim to size if needed. Try adding 1/8″ to the smaller squares and adding 1/4″ to the larger square. This should produce a larger flying geese that you can then trim perfectly to size. I personally have way more luck with my four at a time flying geese when I make them a tiny bit bigger like this.
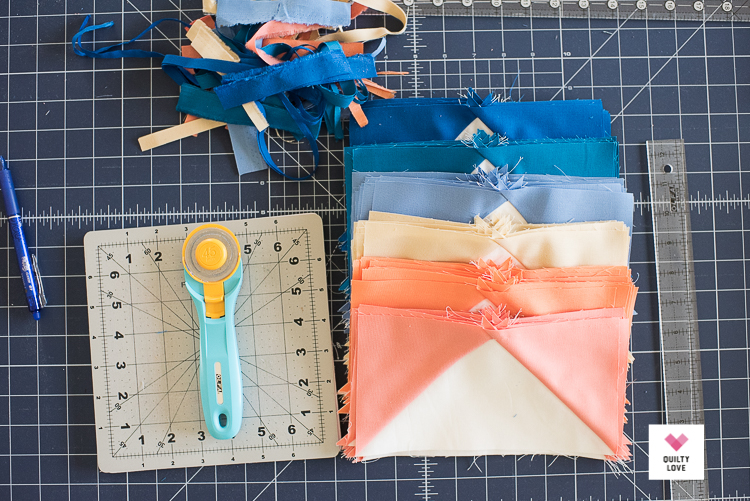
ETA: I’m now a big fan of the Wing Clipper ruler! I highly recommend this ruler for making oversized flying geese that size out perfectly once trimmed. - Pull your smaller squares in a few threads from the corners. I just learned this trick from a quilter on Instagram and it sure is helpful! This alone may be just the trick you need to size out your four at a time flying geese. This really helps ensure you have a good 1/4″ allowance between your triangle peak and top edge.
- Use flying geese quilt rulers. I personally haven’t used speciality flying geese rulers but quilters love them! Two that I’ve heard a lot of good things about are Bloc Loc rulers and Wing Clipper rulers. ETA: I’ve been using the Wing Clipper ruler and love it! It’s more versatile than the Bloc Locs since you can cut many different sized flying geese with it.
- Cut accurately. It’s all going to come back to your cutting skills with no waste four at a time flying geese. Take your time to cut those squares perfectly sized and perfectly squared.
Trimming Flying Geese
If you made your four at a time flying geese a little too big then you will need to trim to size. When I add 1/8″ to my squares it results in the tiniest bit of trimming. Just enough to straighten the top edge.
Ideally, you will want to end up with a nice straight edge along the top of each flying geese. You can try to straighten out that line during the pressing stage. So instead of just pressing fully open and getting wonky edges, you might eyeball it into a straight line. That might mean your seam has a little more fold in it.
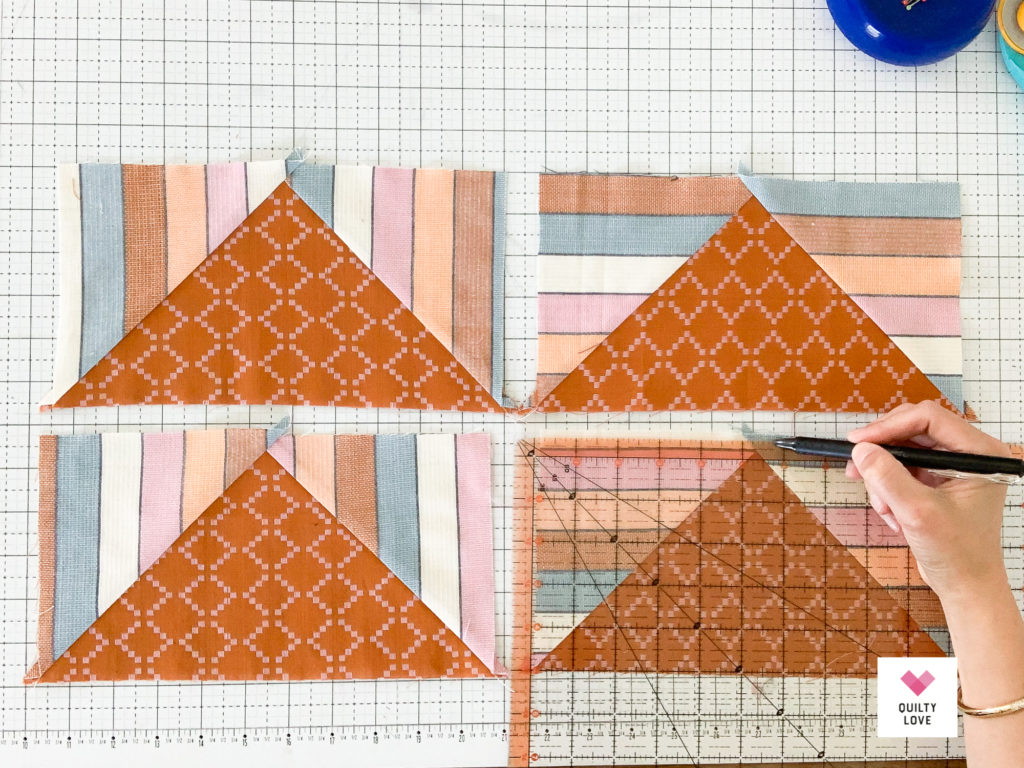
When trimming your flying geese you want to make sure you preserve 1/4″ between the triangle peak and the top edge. I always start by trimming that top edge for that reason.
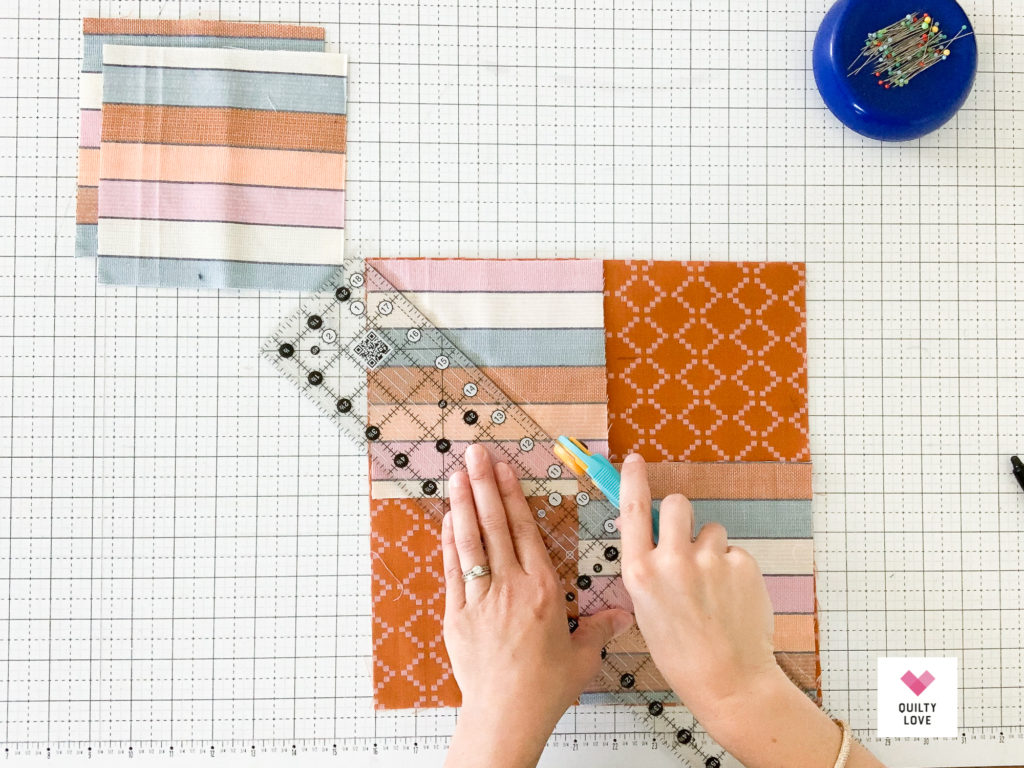
- Start by trimming the top edge and the right side of the flying geese with a ruler that is bigger than the flying geese. As I’m trimming the top edge, I’m making sure I can also trim a tiny bit off the bottom and still have the perfect height.
- Flip and then finish by trimming your flying geese to the exact size. Both of your bottom seams should perfectly go through the corners. If your ruler has a 45 degree line on it you can use that as a guide when cutting. You can see how the 45 degree line goes perfectly on the seam in the third photo.
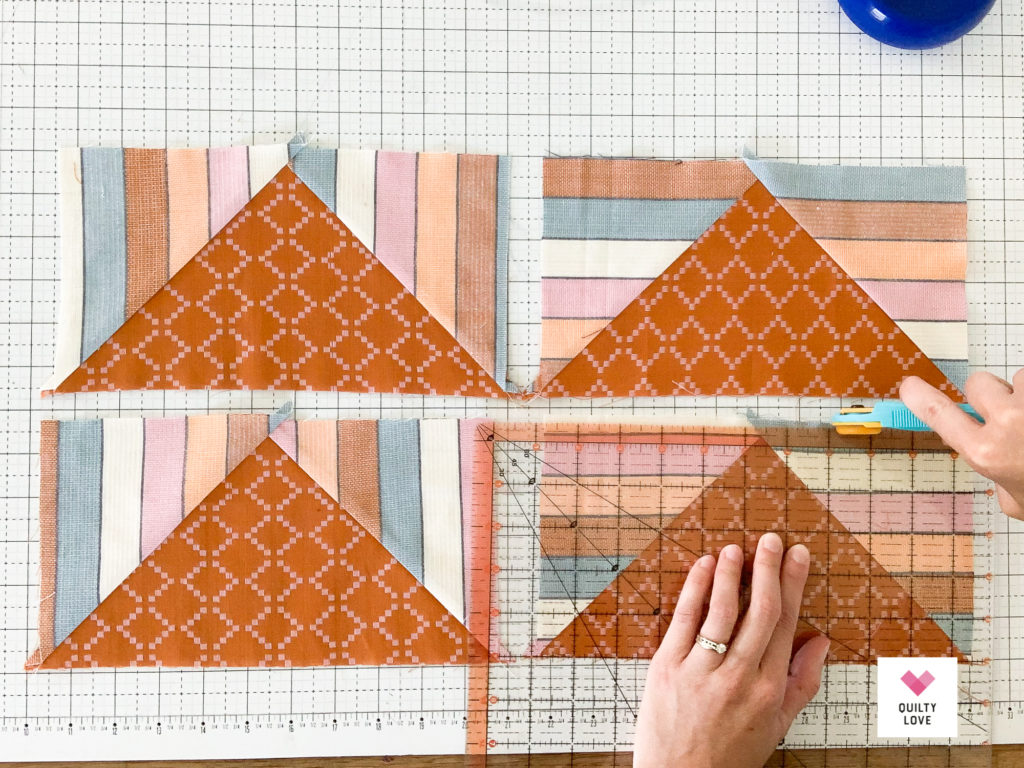
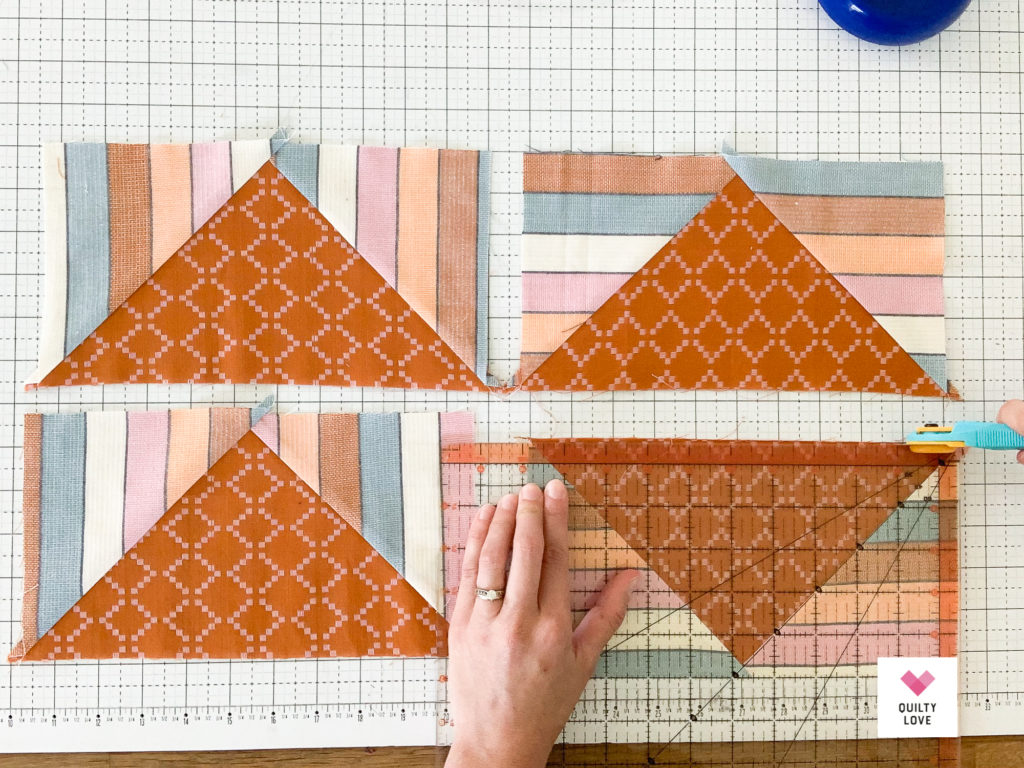
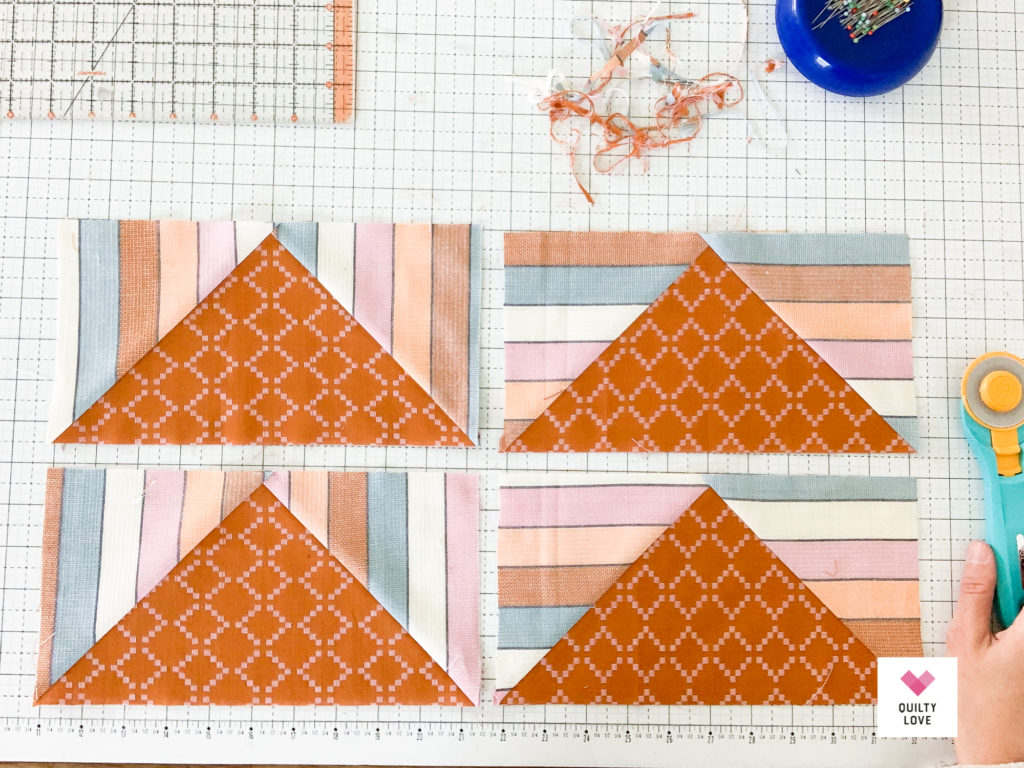
I hope these tips and tricks help you to better size out your flying geese four at a time! And if you have never made flying geese four at a time they really are a fun and clever way to make them.
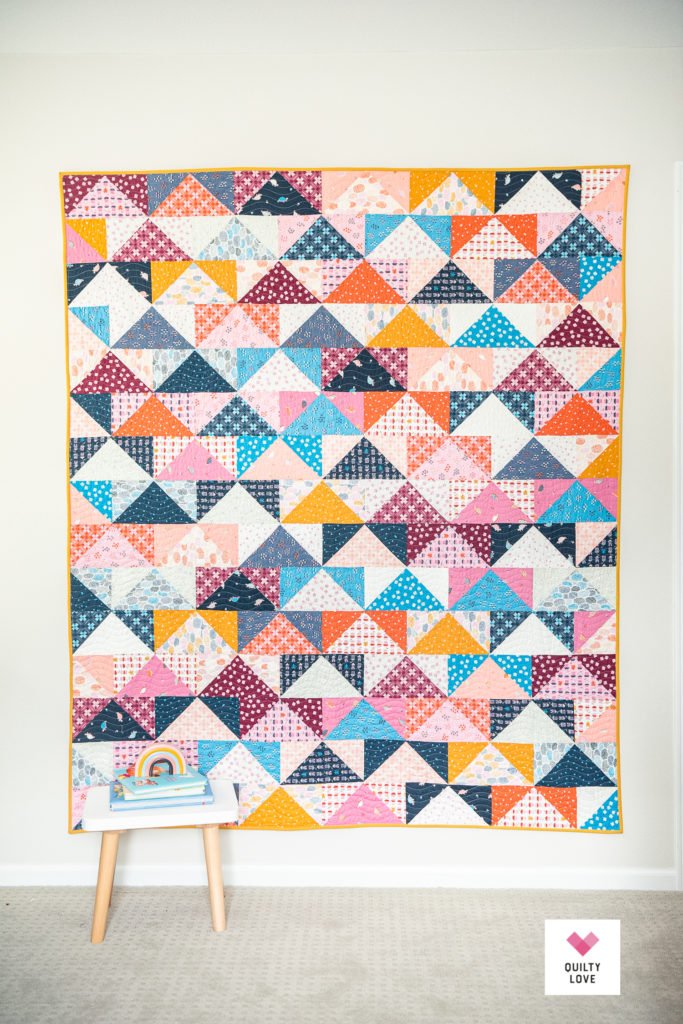
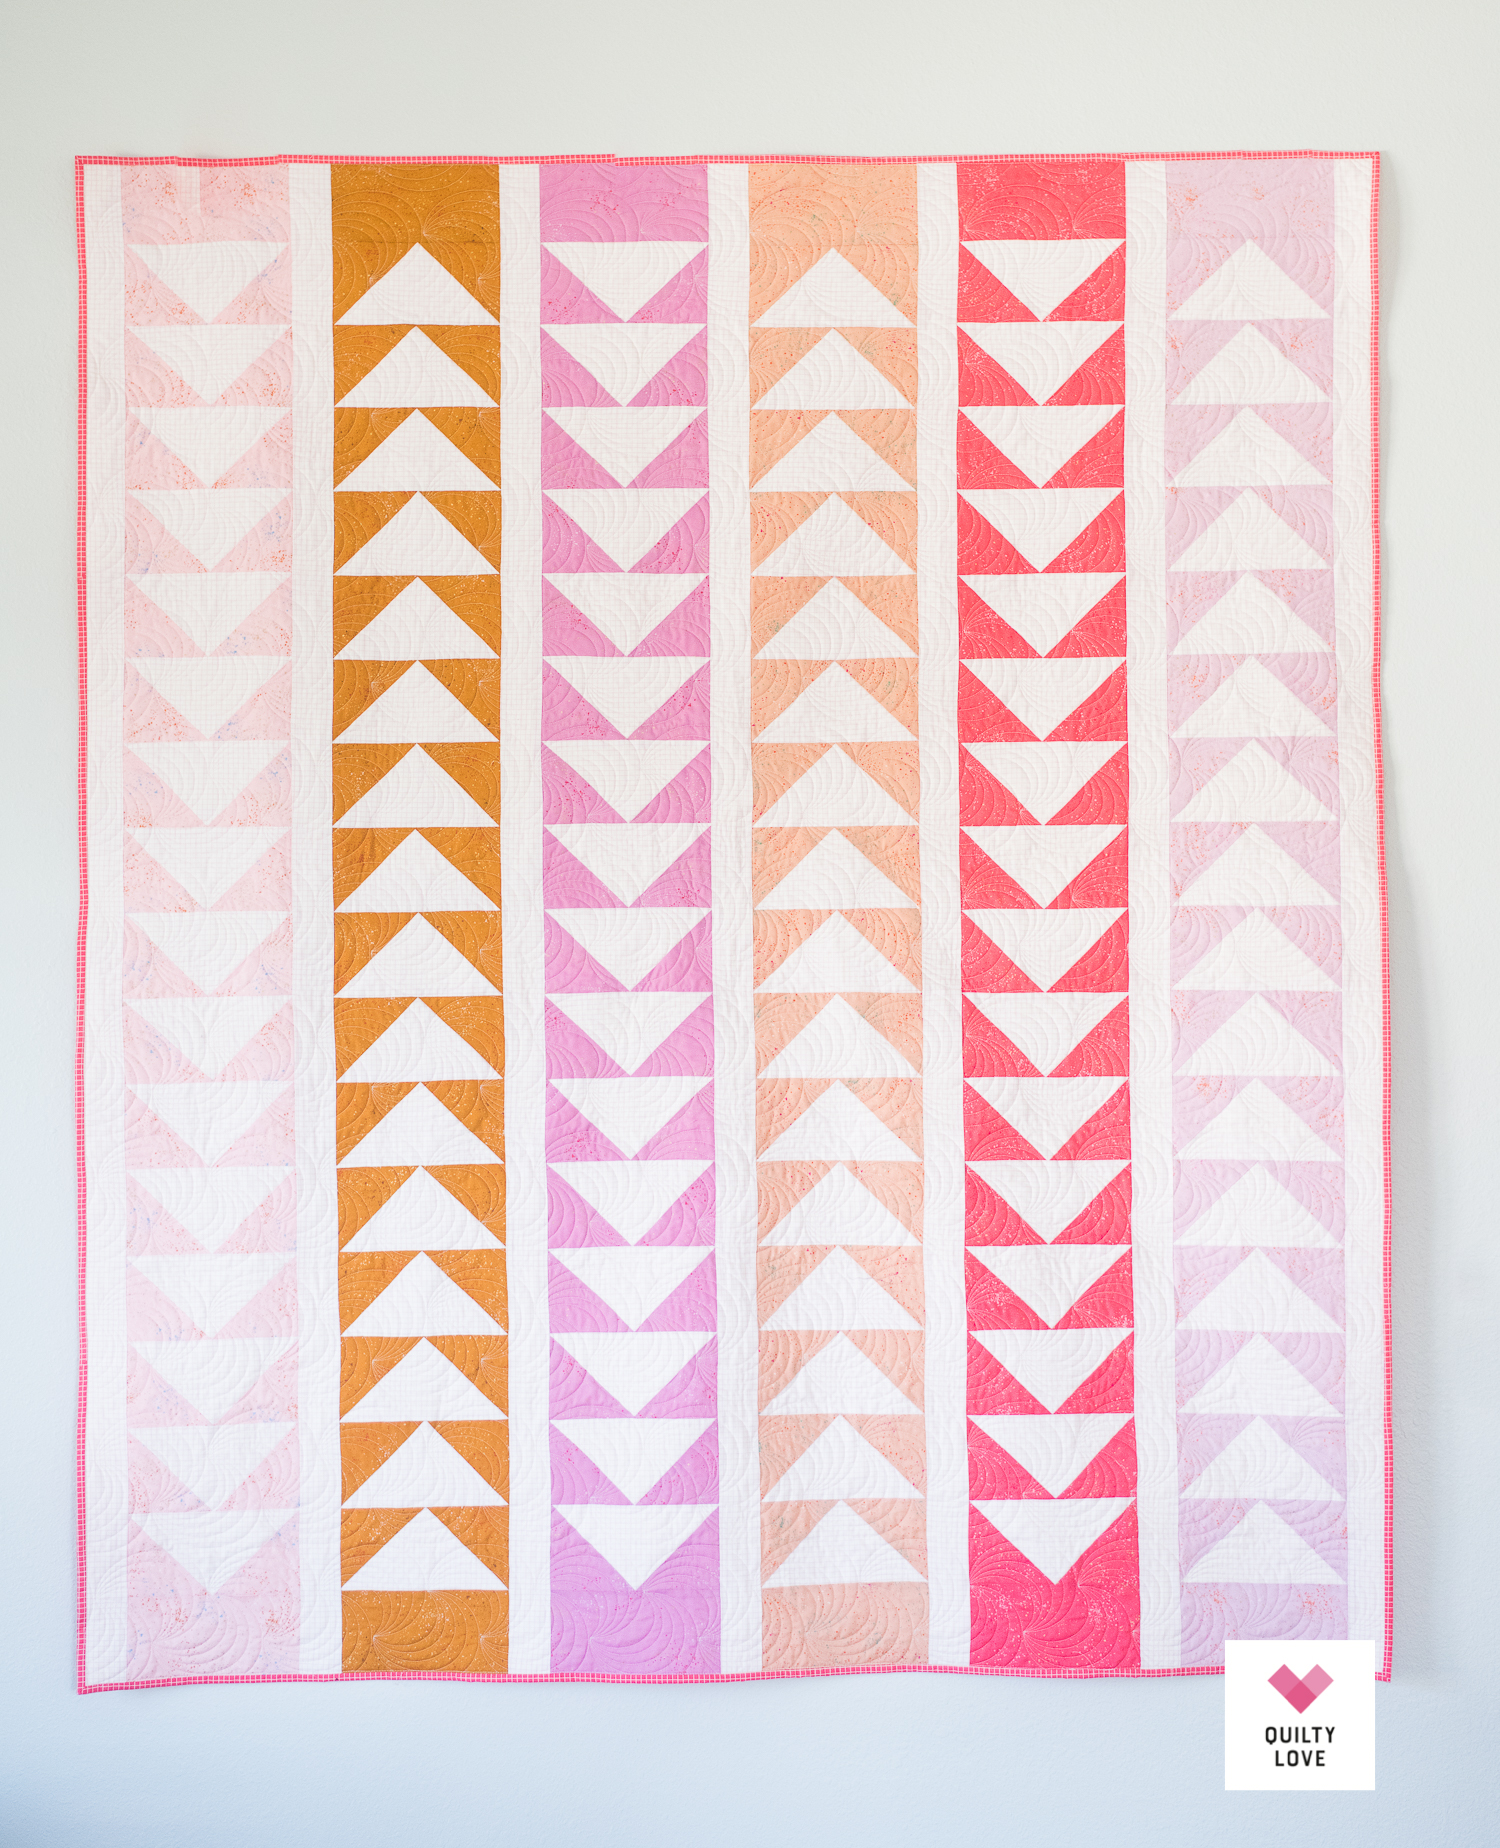
Check out these flying geese quilt patterns:
 Hello, I'm Emily
[…] Patchwork Flying Geese is constructed with no waste flying geese. That means you make them four at a time. If you are looking for some tips and tricks when it comes to making no waste flying geese four at a time, check out this blog post! […]