Learn how to make a doll quilt with this free tutorial.
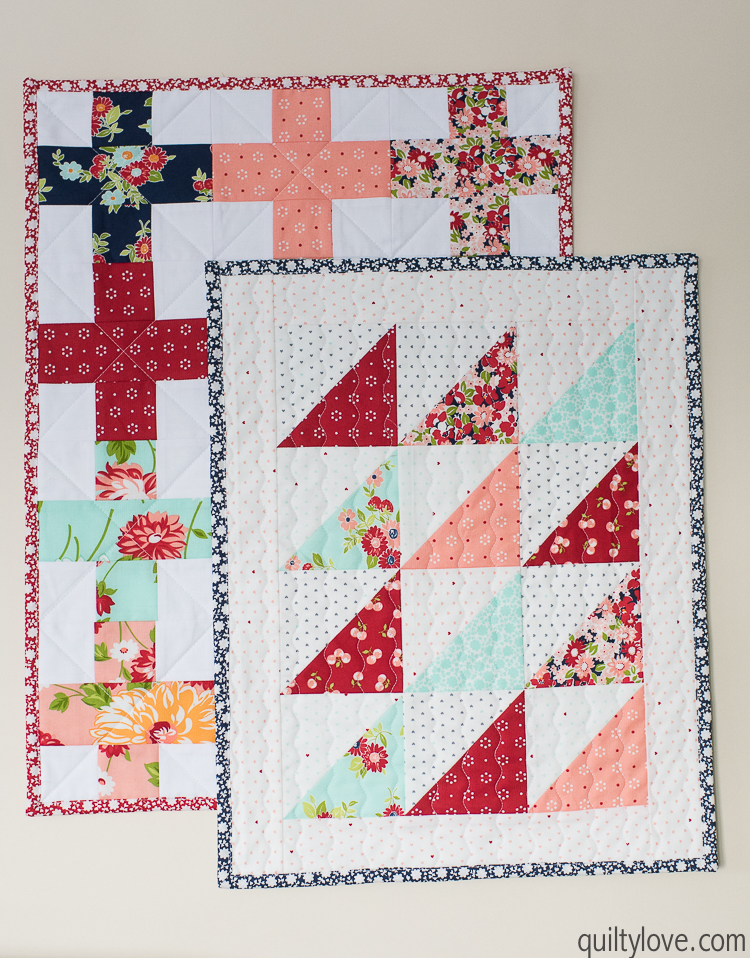
Let’s make this Christmas a handmade Christmas with this easy doll quilt tutorial. I love making doll quilts to give as Christmas gifts because they are adorable, easy to make and are a quick satisfying quilt finish. These are the perfect size for American Dolls.
Here is how to make a doll quilt:
 Supplies needed to make a doll quilt
- Fabric scraps (I’m using The Good Life by Bonnie and Camille)
- background fabric (about a fat quarter should do)
- binding fabric (Either two width of fabric strips or four fat quarter width of fabric strips)
- A small piece of batting (about 20in x 26in)
- backing fabric (about the same size as the batting)
- cutting mat
- rotary cutter
- quilt ruler
- pins
- thread
The average size of a doll quilt is about 18in by 24in. This plus quilt will measure about that.
WOF = Width of fabric
RST = Right sides together
Use a 1/4in seam allowance
Follow the steps below or click here for a downloadable PDF copy. The download includes two extra doll quilt patterns!
Step One: Cut the background squares
- Cut x48 2.5in squares
Step Two: Cut the print fabrics
Choose the 12 fabrics that will be the plus signs. I’m using leftover 2.5in strips.
From each fabric:
- Cut two 2.5in squares
- Cut one 2.5in x 6.5in rectangle

Step Three: Sew together the plus blocks
- Sew together a background 2.5in square, a print 2.5in square and another background 2.5in square.
- Press seams open or towards one side.
- Repeat for both the top and bottom row of the block.
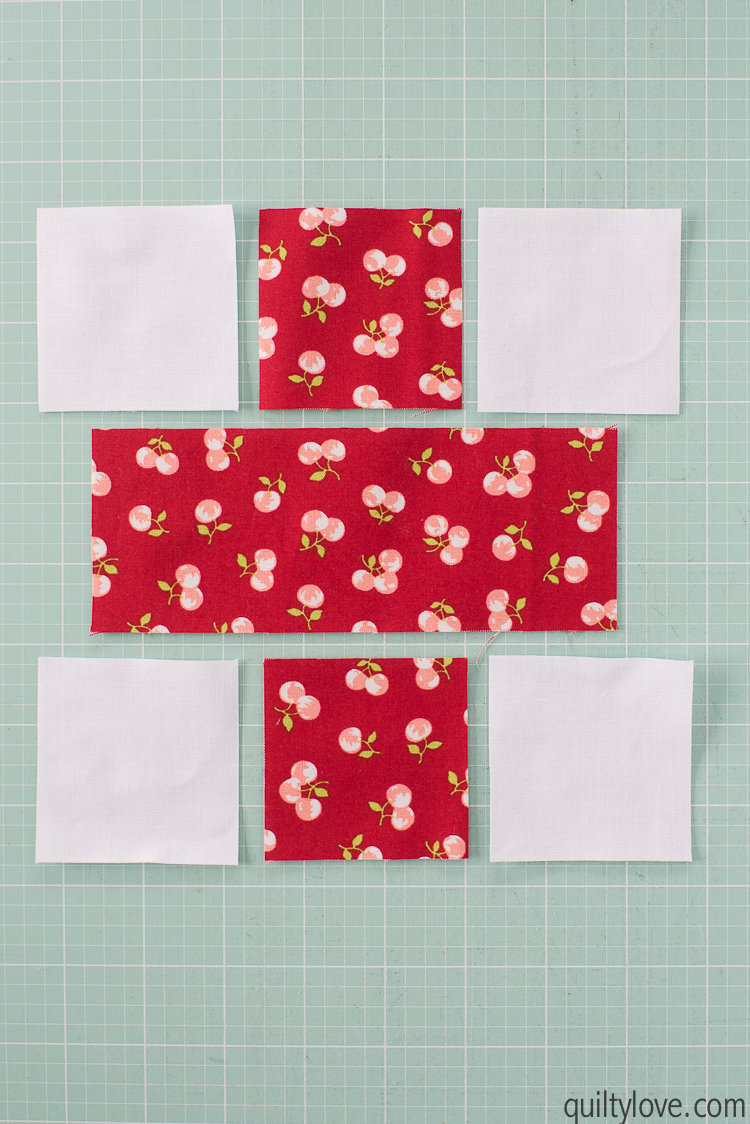
Sew the squares together by placing them right sides together (RST).
Sew the plus blocks together faster by chain piecing them. Chain piecing means you feed them through your machine one after the other without breaking the thread. Or otherwise known as how to make a doll quilt much faster 😉 Chain piecing not only is faster but it saves a lot of thread.
Once all the units are sewn, remove them from the machine and snip the joining threads. 

- Finish sewing the plus block together by sewing the top and bottom units to the center unit.
- Press seams open or both in the same direction.


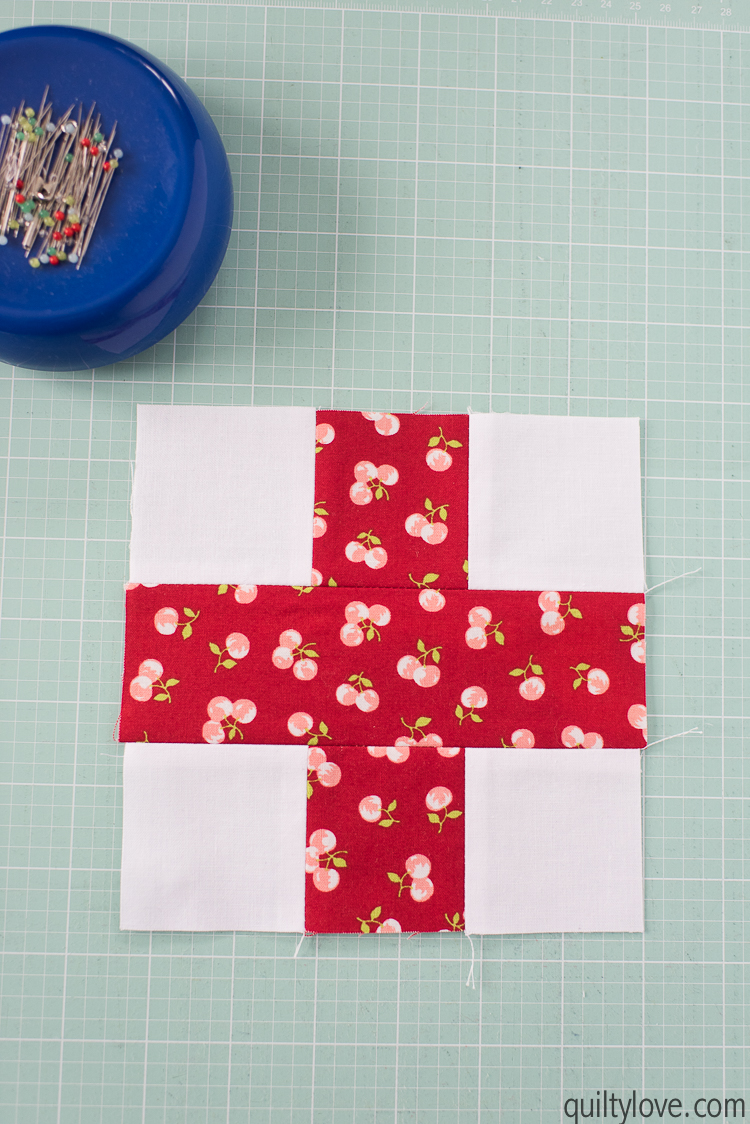
I’m a seams open quilter which means a lot more pinning. Press your seams open for a nice flat quilt top or follow the pressing directions for nested seams. Nested seams sew together faster since less pins are needed.

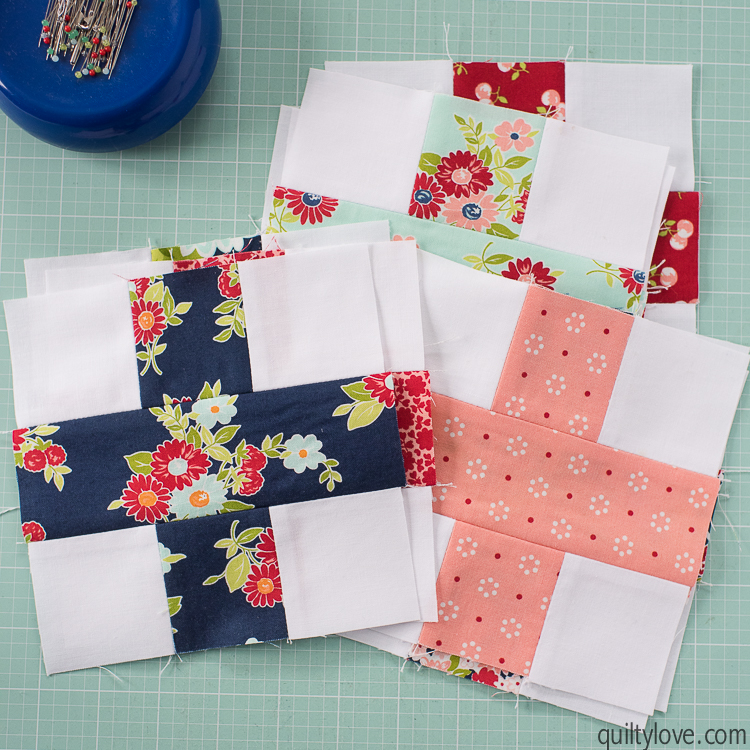
- Make all 12 plus blocks.
Step Four: Sew together the doll quilt top
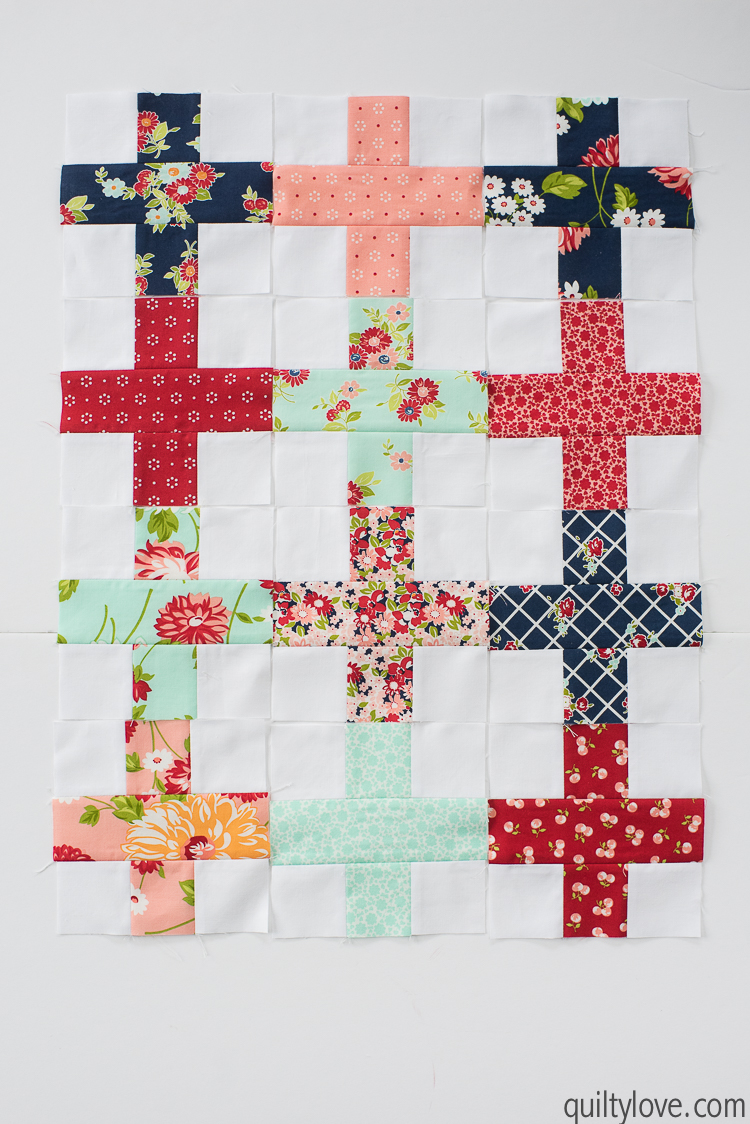
- Arrange the plus blocks in four rows of three as shown below. If your seams are not pressed open arrange the blocks in the proper orientation so the seams are nesting.
- Sew together each row. Press seams open or each row in opposite directions.
- Finish the quilt top by sewing rows together.
- Give the finished plus quilt top a good press.


Step Five: Baste the doll quilt
In this step we will baste the doll quilt and prepare it for quilting. Basting is where all three layers of the quilt top are secured together for quilting.
- Start by laying out the doll quilt backing with the wrong side facing up.
- Next, add the piece of batting.
- Lastly, place the finished doll quilt top on top of the layers. Smooth out the three layers. You might consider pinning the layers together to hold them in place. I didn’t use pins for this quilt because it is pretty small. If you are new to quilting it might not be a bad idea to add a few pins.
Step Six: Mark the quilting lines
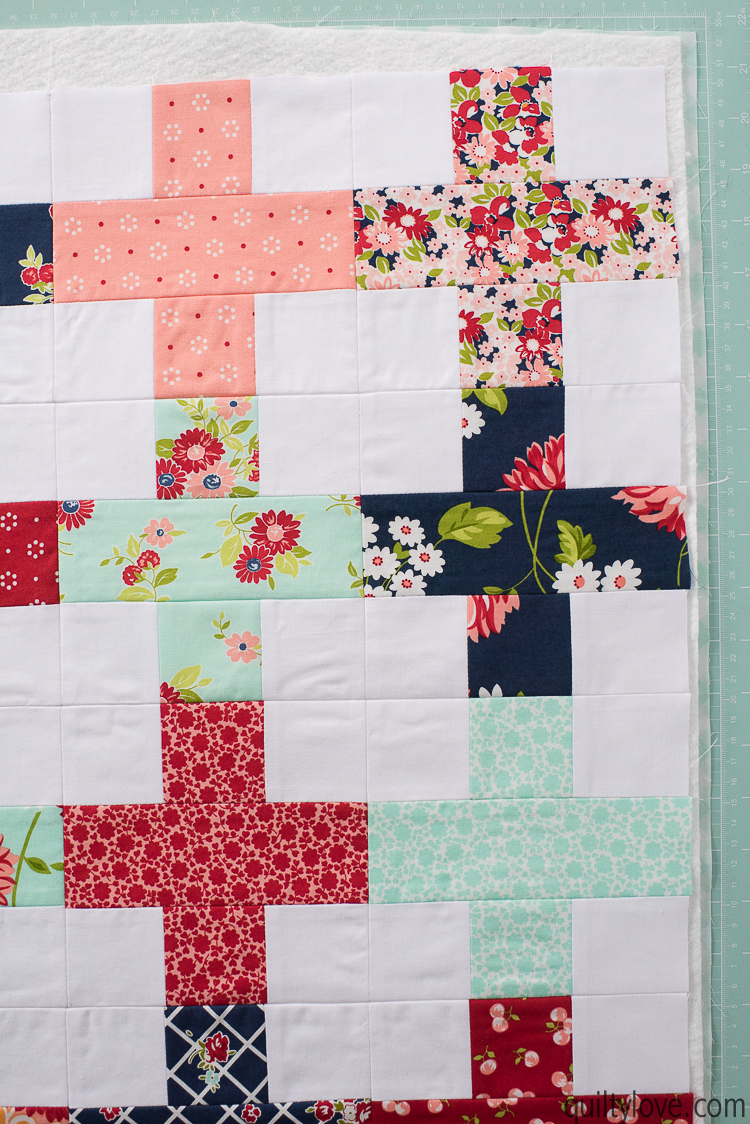
I quilted simple diagonal lines on this doll quilt and used a Hera marker to mark the lines. If you don’t have a Hera marker find something to gently press lines into your quilt.
Or just quilt another design. A simple quilting method is to follow the seams. Quilt straight lines on each side of each seam.

Step Seven: Quilt the doll quilt
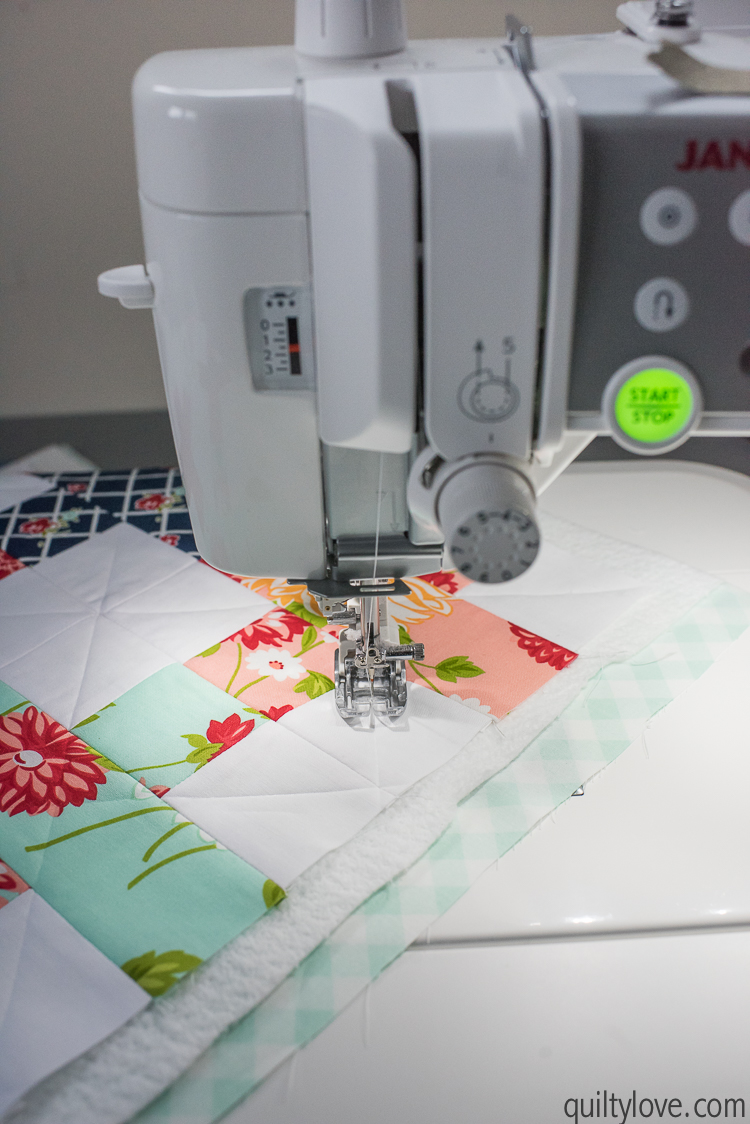
Quilt your doll quilt. I always recommend a walking foot when quilting straight lines. I recommend using a stitch length of about 3.0 when quilting straight lines.
If you ever plan to quilt something more than once go ahead and get a walking foot! I made this doll quilt on a machine I’m testing for Janome but usually I use an inexpensive walking foot. I picked up this cheap walking foot for my Janome machine. Just be sure the foot you choose works with your machine. Many of them are universal.
Step Eight: Bind the doll quilt
- Trim the quilt square using a quilt ruler.
Make the binding:
- Sew together the 2.5in strips of fabric. Press seams open.
- Fold the binding wrong sides together length wise and press.
Attach the binding. I have a simple machine binding tutorial here to walk you through this step.

And now your super adorable American doll quilt is ready to be wrapped up and found underneath someone’s Christmas tree! Now that you know how to make a doll quilt, whip up a few of these this Christmas season to give as gifts.



 Hello, I'm Emily