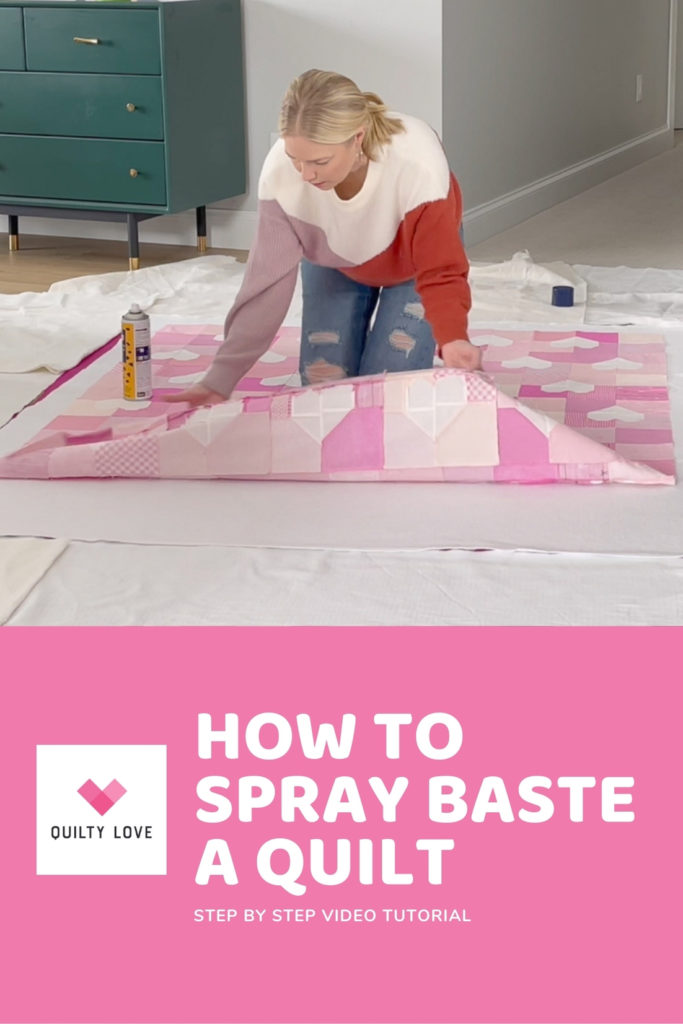
This tutorial on how to spray baste a quilt is long overdue! I’m excited to say that I finally have a full spray basting tutorial ready for you!
In this tutorial I will walk you through the entire process of spray basting your quilt. I prefer spray basting my quilts instead of pin basting because it’s so quick and easy. Plus I have way better luck with the outcome of my quilting when I use spray baste.
So if you are ready to start quilting your own quilts, the first step is basting them. I’ll teach you how here!
Scroll down for the full video tutorial or read the step by step instructions below the videos.
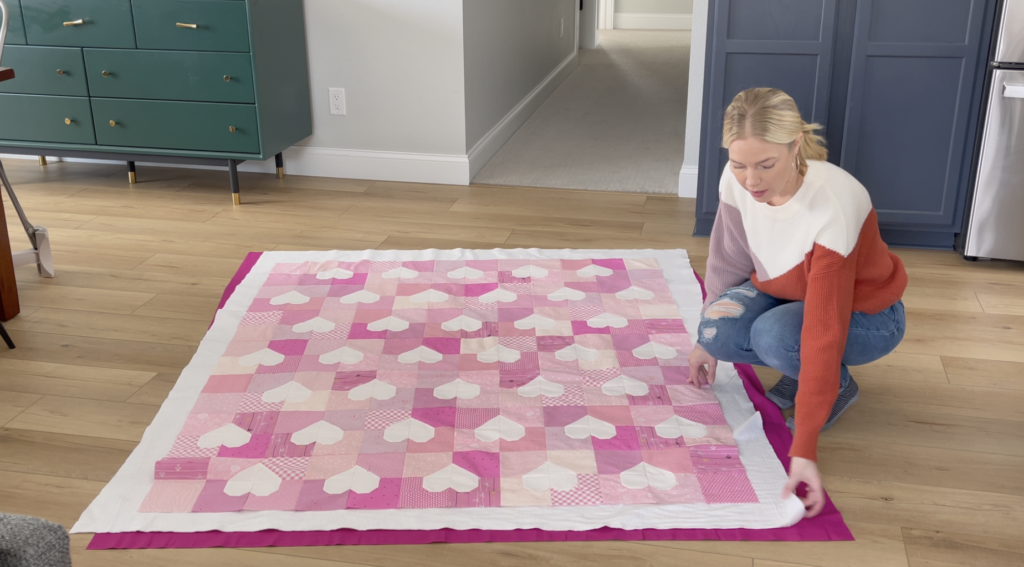
Quilt pattern used in this tutorial: Patchwork Hearts Quilt
What is quilt basting?
Basting is the step in the quilt making process where you secure all three layers of the quilt (the quilt top, the batting and the backing) and prepare it for quilting. There are several ways you can baste a quilt with the most common two ways being pin basting and spray basting.
Pin basting is securing those layers with quilt basting pins. The pins used for pin basting a quilt look like a safety pin but have a special curved side making it easier to rock the pins through your quilt layers.
Spray basting is securing the quilt layers using a sprayed on glue. There are several different spray basting products on the market. This spray baste has always been my favorite and I’ve never had problems using it.
Spray Basting vs pin basting
So why would you choose one method of basting over the other? There would be a few reasons to choose one way over the other! The two biggest reasons I choose spray basting over pin basting my quilts is time and skill.
I have tried pin basting several times and my quilt never quilts up as nicely as when I spray baste. I end up with too much fabric moving and pulling and shifting during quilting when I pin baste.
The other reason I prefer to spray baste my quilts is because it is so much faster! I can spray baste a quilt from start to finish in about 20 – 30 minutes. That includes taping down the backing and everything. Pin basting takes so much longer since you need to manually place pins every few inches apart on the entire quilt top.


How to spray baste your quilts – video tutorial
I have a full video tutorial that will show you how to spray baste your own quilts and get them ready for quilting. I’ll share the videos and also step by step instructions below the videos for those who prefer to scroll.
The first video is prep and the supplies you need for quilt basting. The second video is the actual quilt basting tutorial.
Supplies for Spray Basting a quilt
- A nicely pressed quilt top
- Batting cut to size (See options at the bottom of this post) – The batting should be at least 3 inches larger than the quilt top on each side
- Quilt Backing cut to size – Use a wide back fabric or piece your quilt top and then cut to size if it’s really oversized. The backing should be at least 4 inches larger than the quilt top on each size.
- A can of Spray Baste – This is my favorite brand
- Tape to tape down your backing – Painters tape or my favorite kraft tape
How to Spray Baste your quilts – A step by Step tutorial
Give both the quilt top and the quilt backing a nice press. Make sure the seams are all laying nice and flat. If they aren’t you can use starch or a spray bottle of water to try to press the seams a little better.
Cut the batting and backing to size. The batting should be around 3 inches wider than the quilt top on all sides. The backing should be around 4 inches wider than the quilt top on all sides. This doesn’t have to be exact but you want to make sure the bottom two layers are big enough where the quilt top won’t slip off any edges as you baste or quilt.
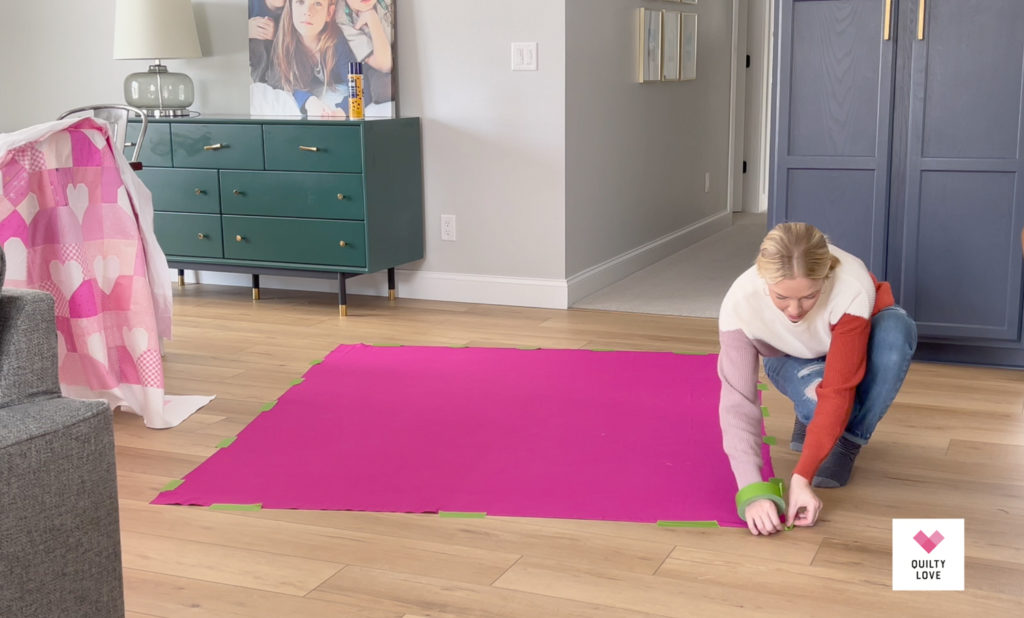
Step One: Tape down the backing fabric
First start by taping down the entire backing fabric on all sides using painters tape or kraft tape.
Painters tape never worked on my old linoleum floors and it doesn’t stick to some fabrics. If that is the case then try this kraft tape. It sticks to everything!
You want the quilt top to be taut but not pulled too tightly. Pull it just enough to get the wrinkles out but not so tight that it will bounce back to its original size when you pull up the tape.
Don’t be afraid to tape generously especially as a newer quilter.
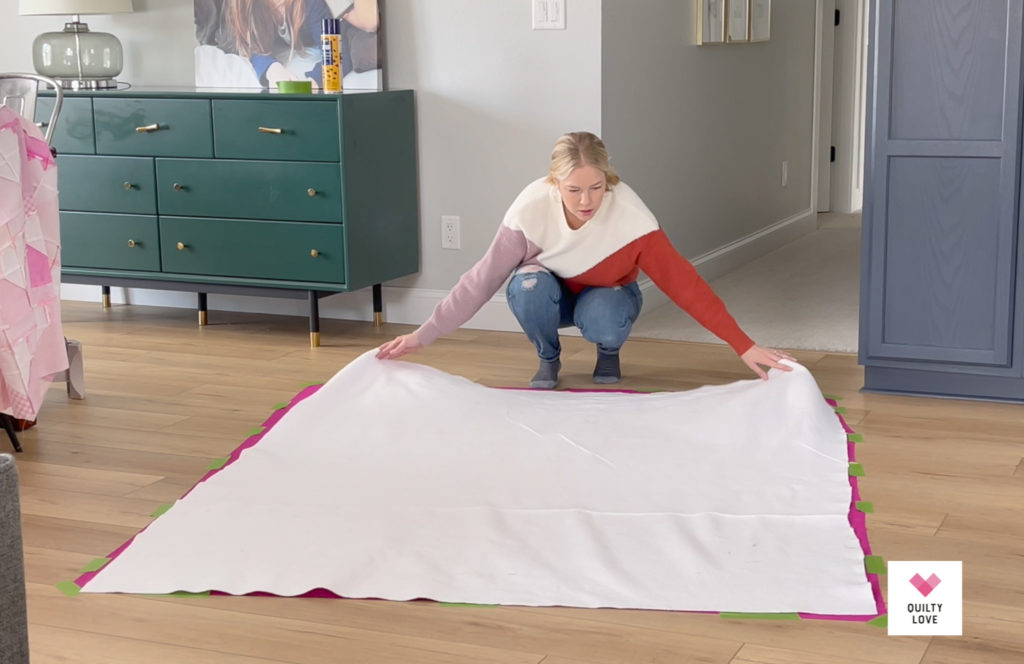
Step Two: Place batting down on top of backing
Place your backing down on top of the quilt top before you start spraying it. You want to place it straight so you know it will fall back into place straight when you start spraying.
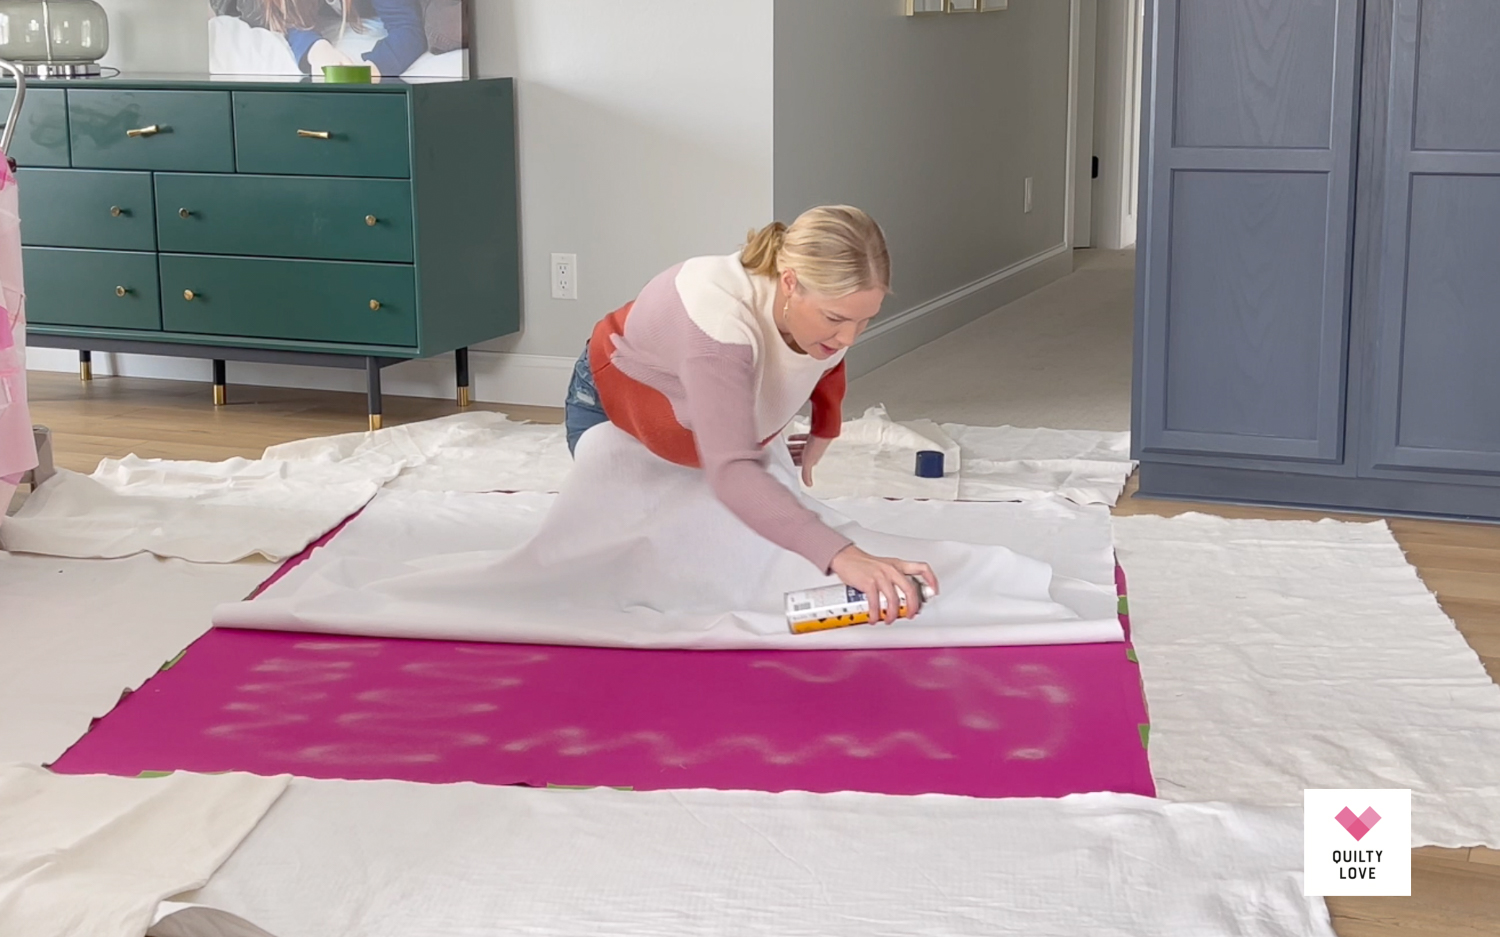
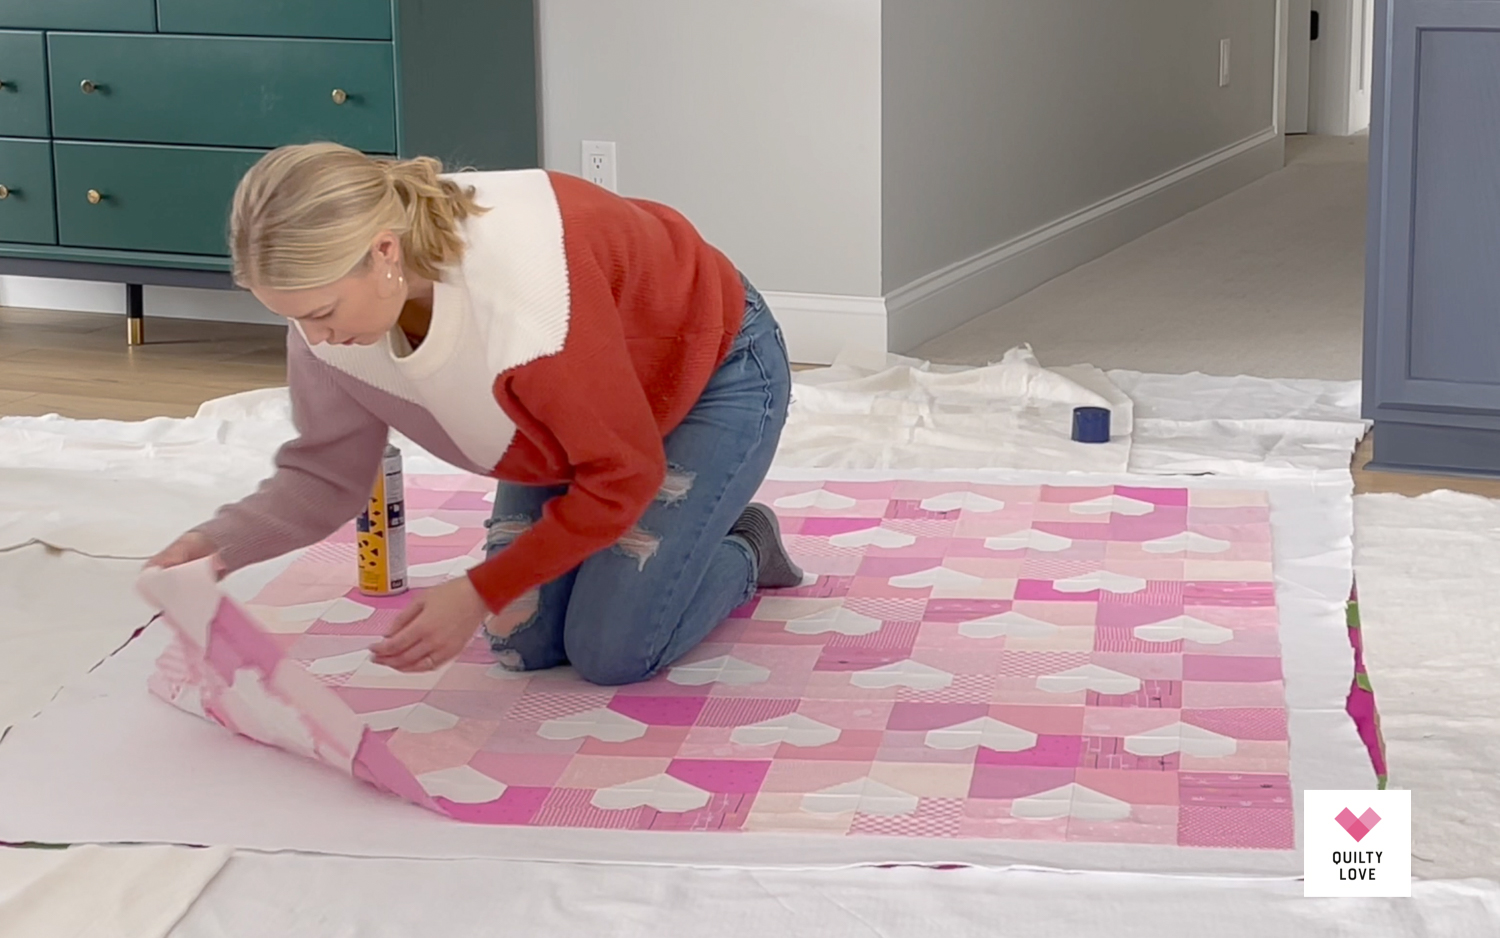
Step Three: Spray baste the batting to the backing
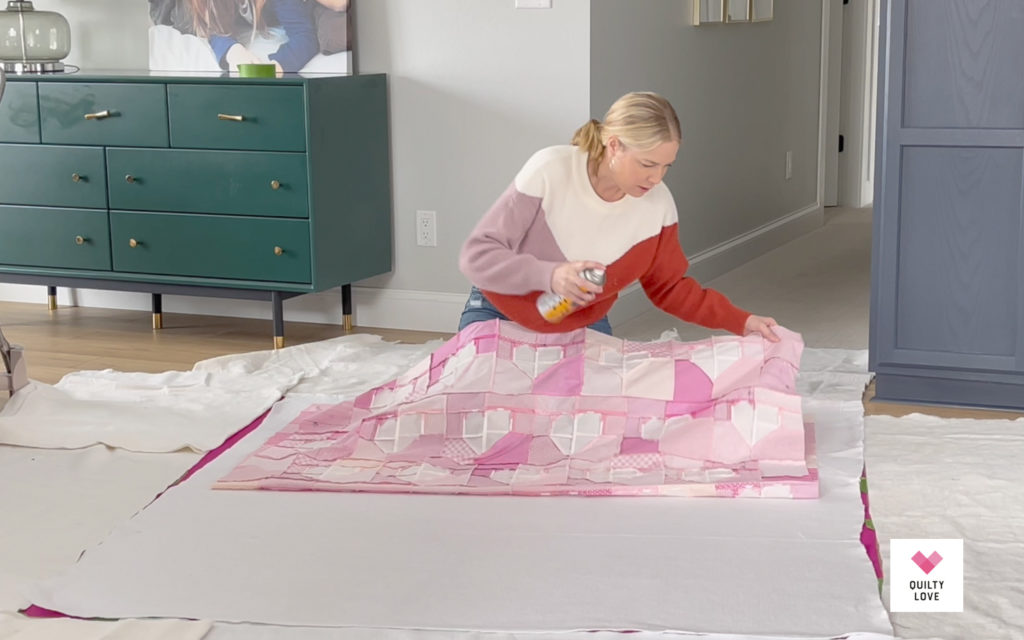
Pull the batting half way back and start spray basting the backing in sections. I like to work in 1.5 – 2 foot sections. That means a smaller throw like this one is done in about 2 sections per half.
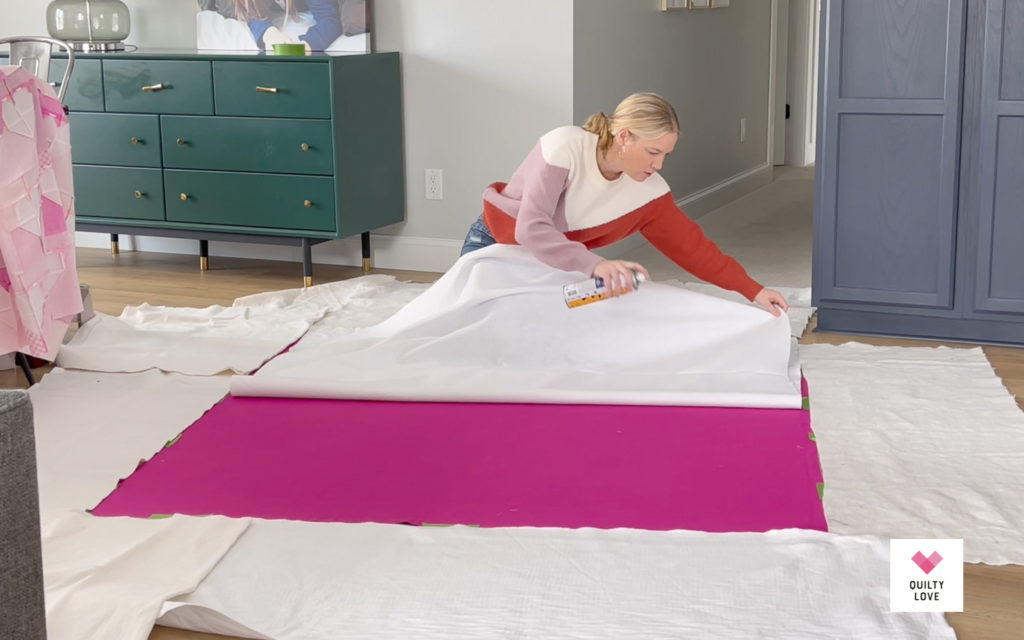
The spray baste bottle may recommend that you always spray the batting but I’ll spray to which ever surface seems to stick better. In this case I was using a Ruby Star Society Wide back and it’s pretty silky. So it was sticking better when I sprayed the backing fabric instead of the batting.
Pull the center of the batting that was just sprayed up and smooth out. Reposition the batting as needed.
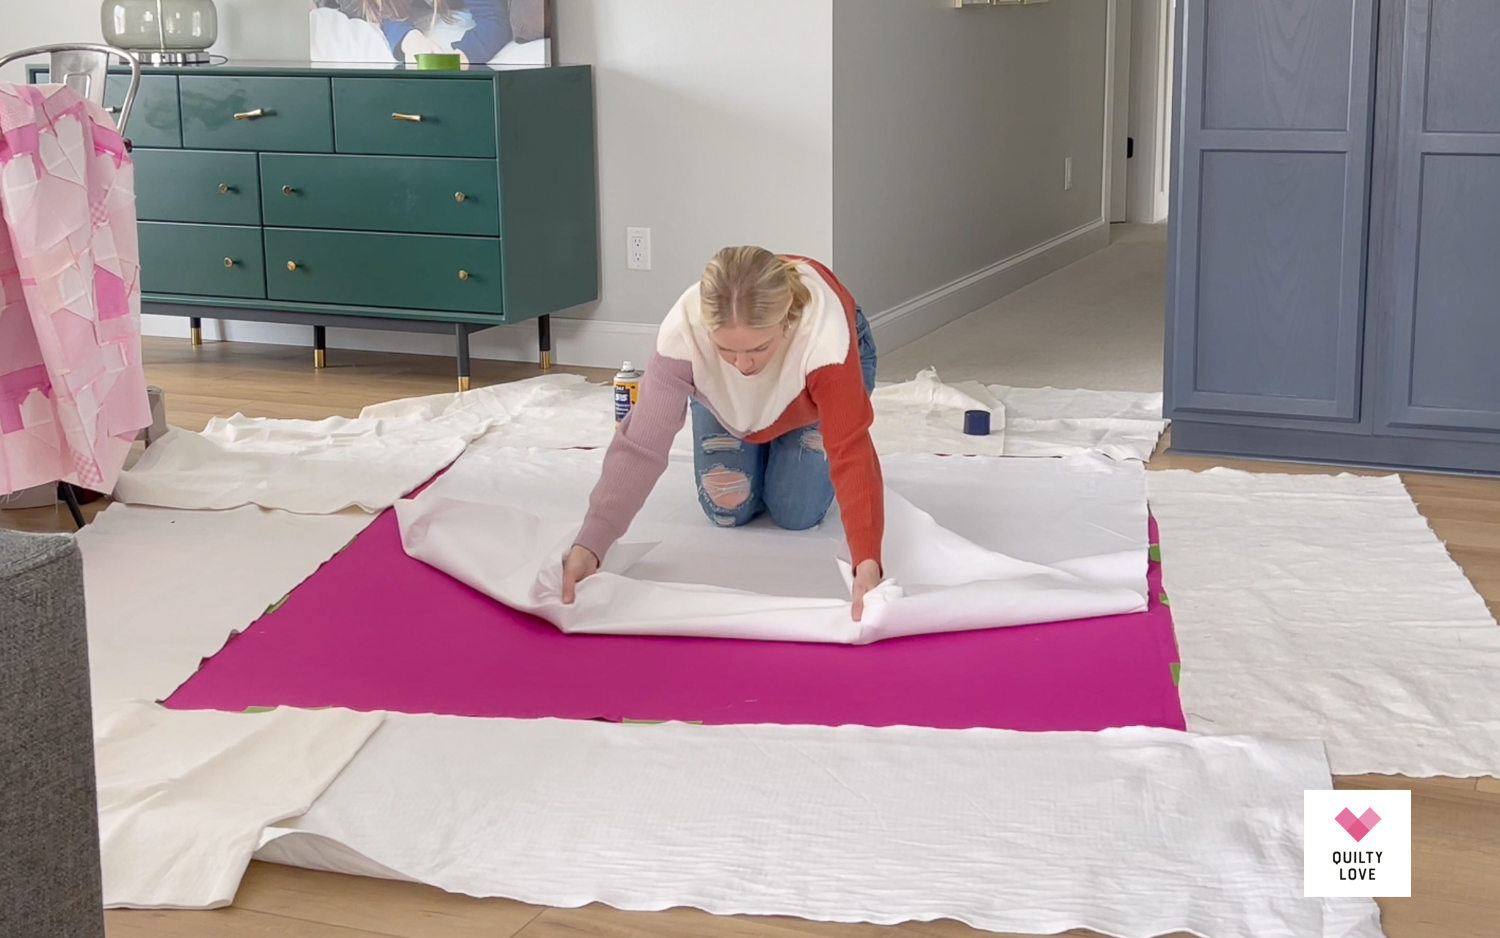
Then pull each corner up and smooth out.
Repeat those same steps for the next section. Pull the batting back until you feel it catch where it’s already been sprayed and then spray the next section.
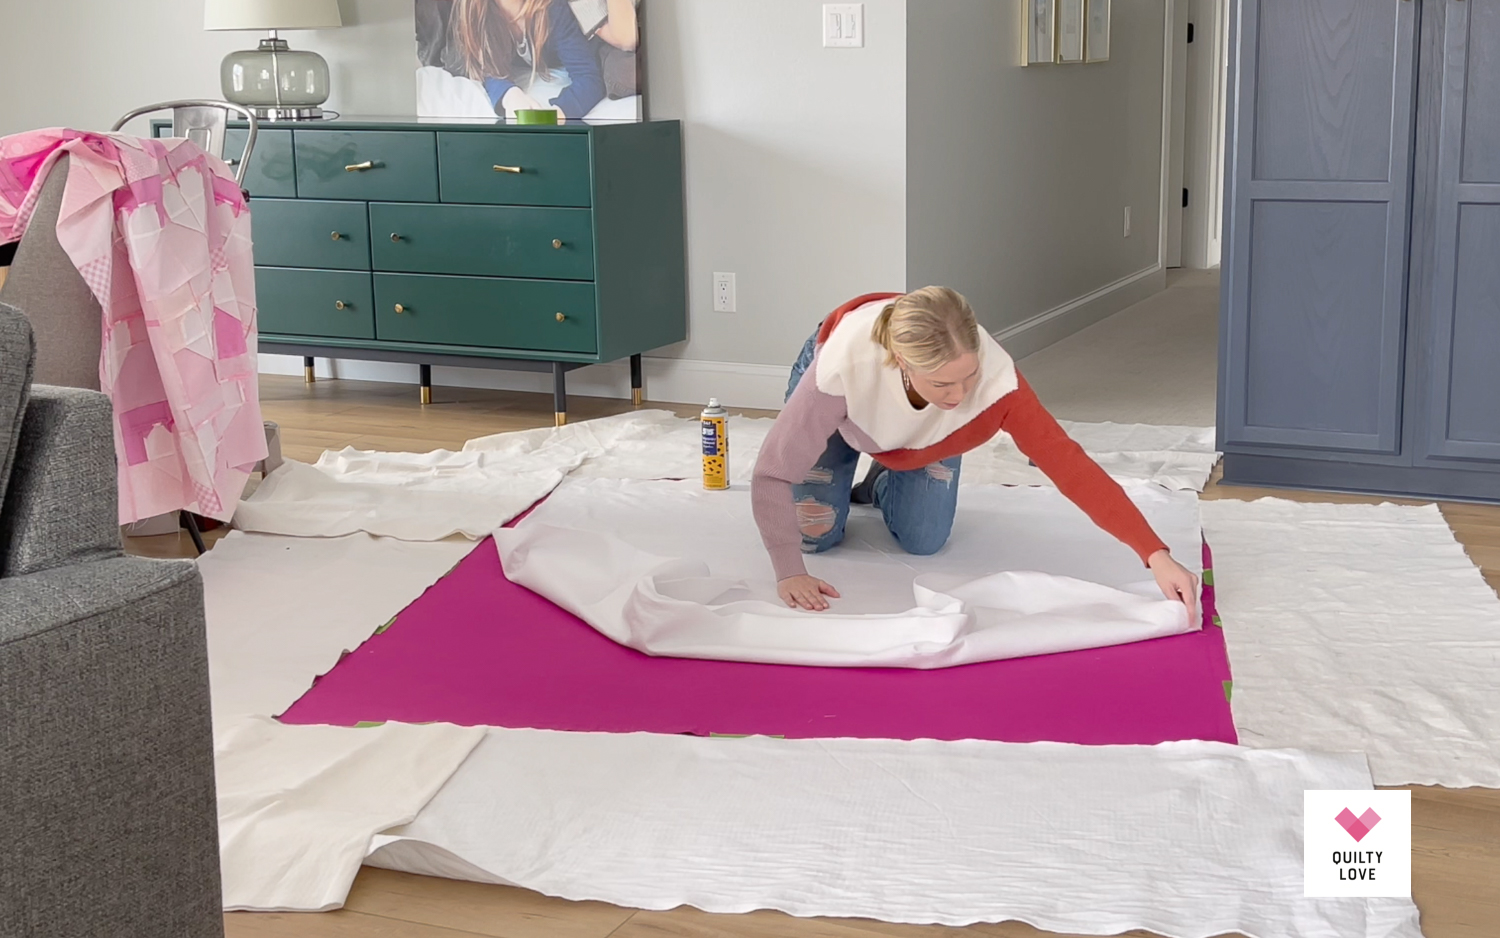
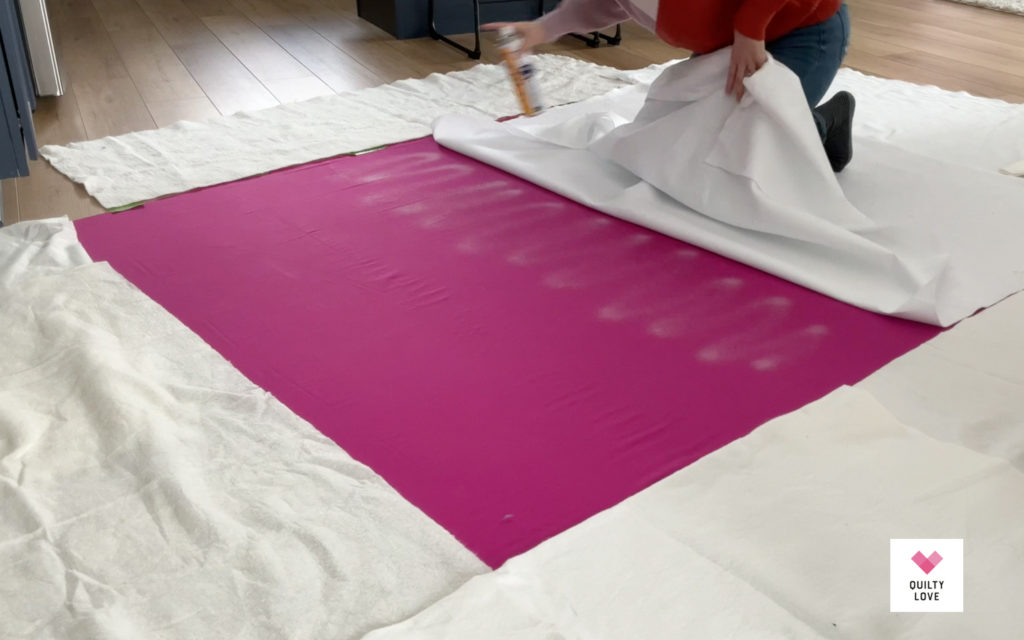
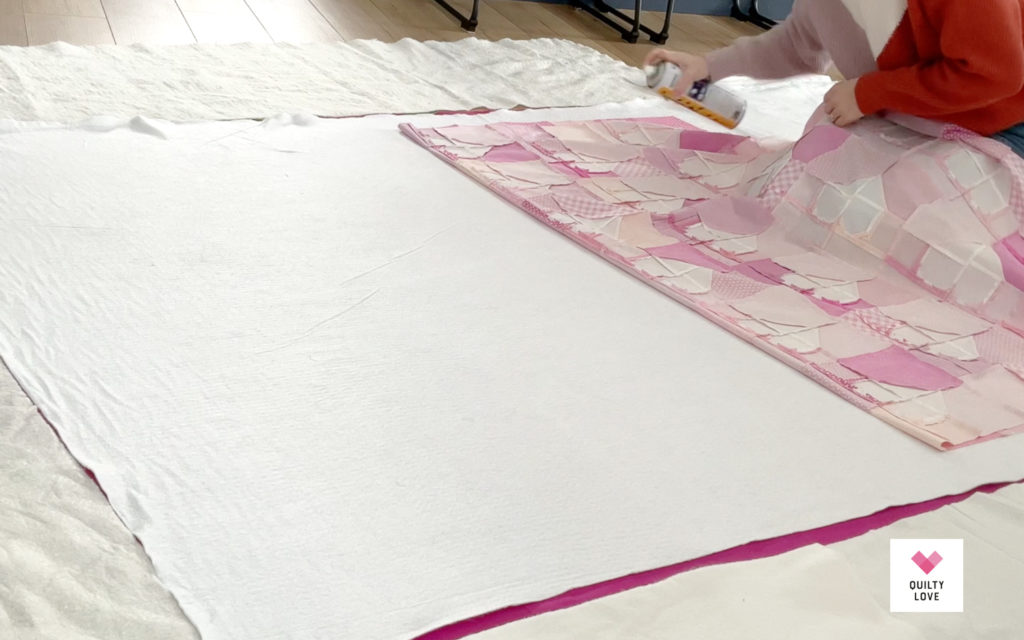
You can see in the images below how much glue baste I use. I switched to spraying the backing fabric instead of the batting because it stuck better.
First place and smooth the center.
And then place and smooth the sides.
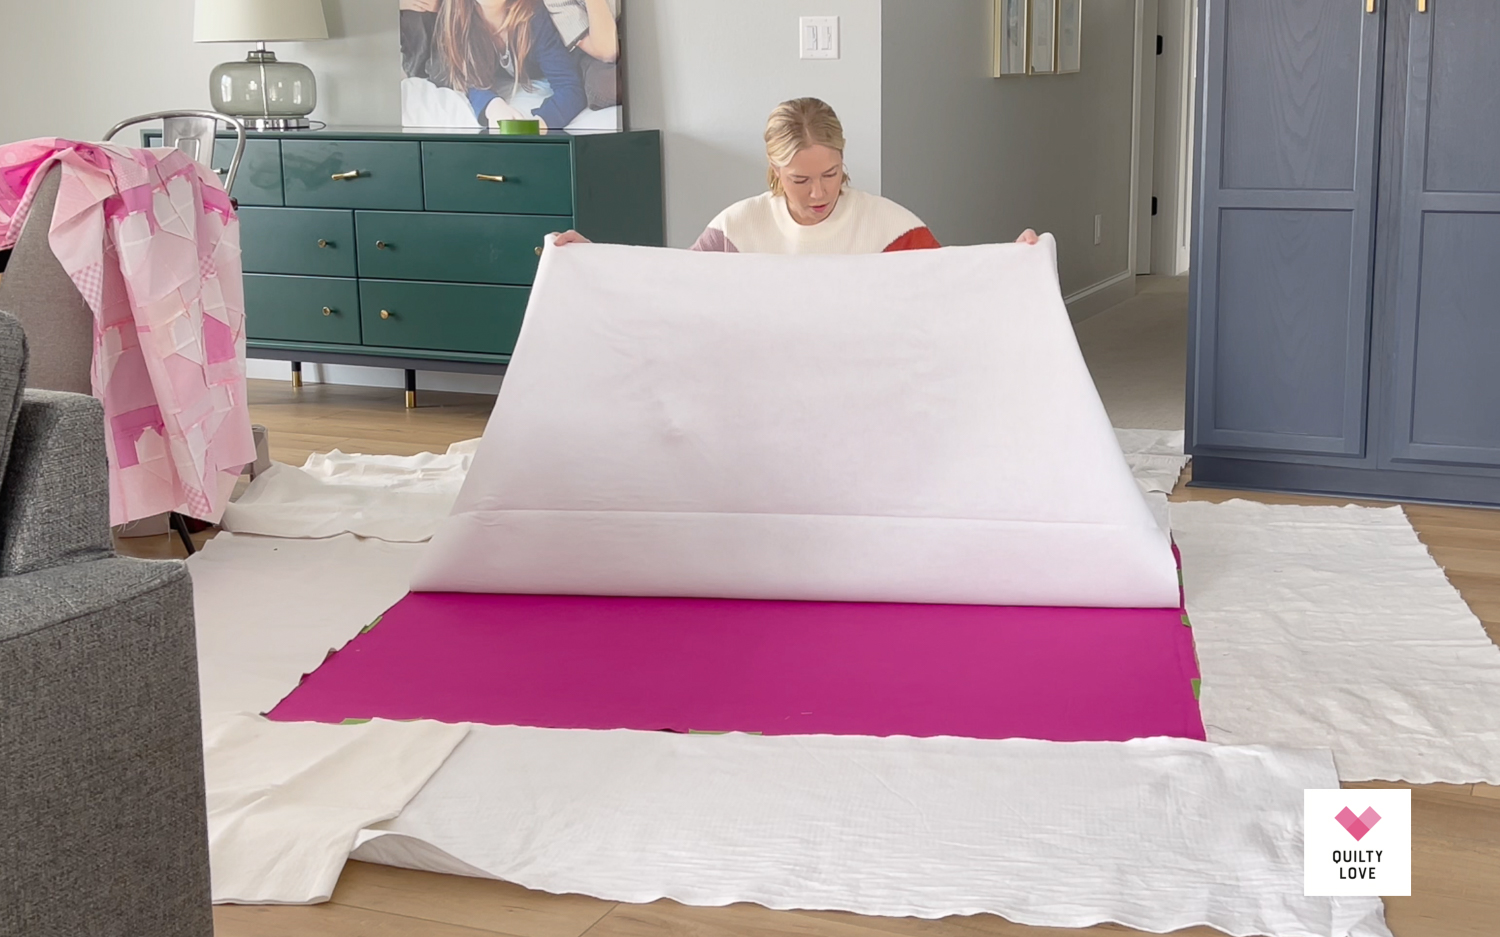
Once the first half of the batting is secure, turn around and repeat for the other half.
Pull the batting back until you feel it catch and spray baste in sections.
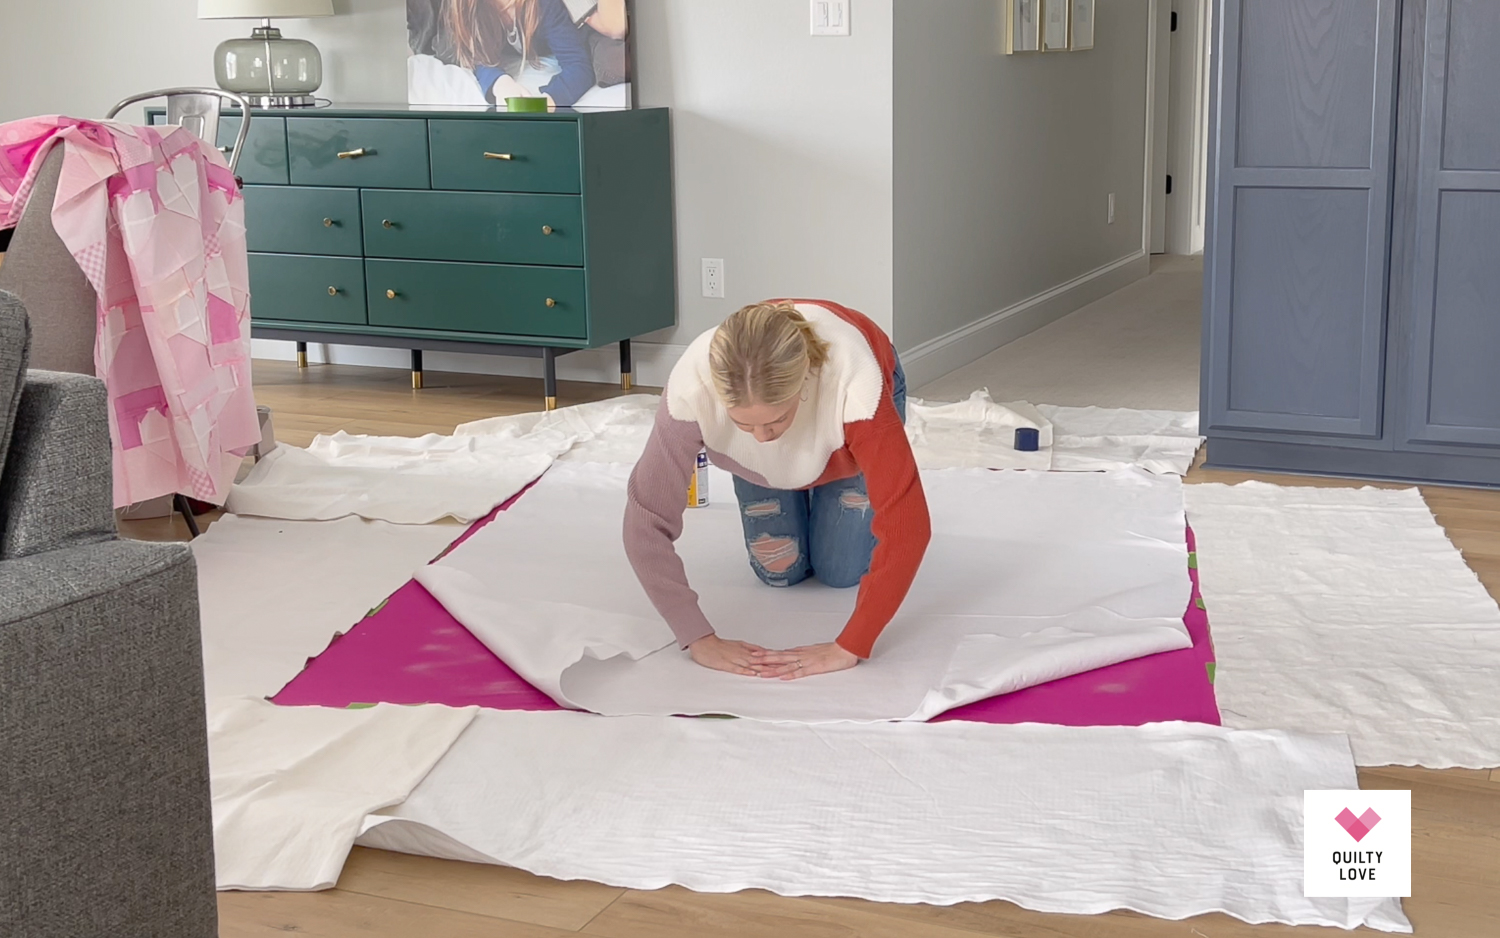
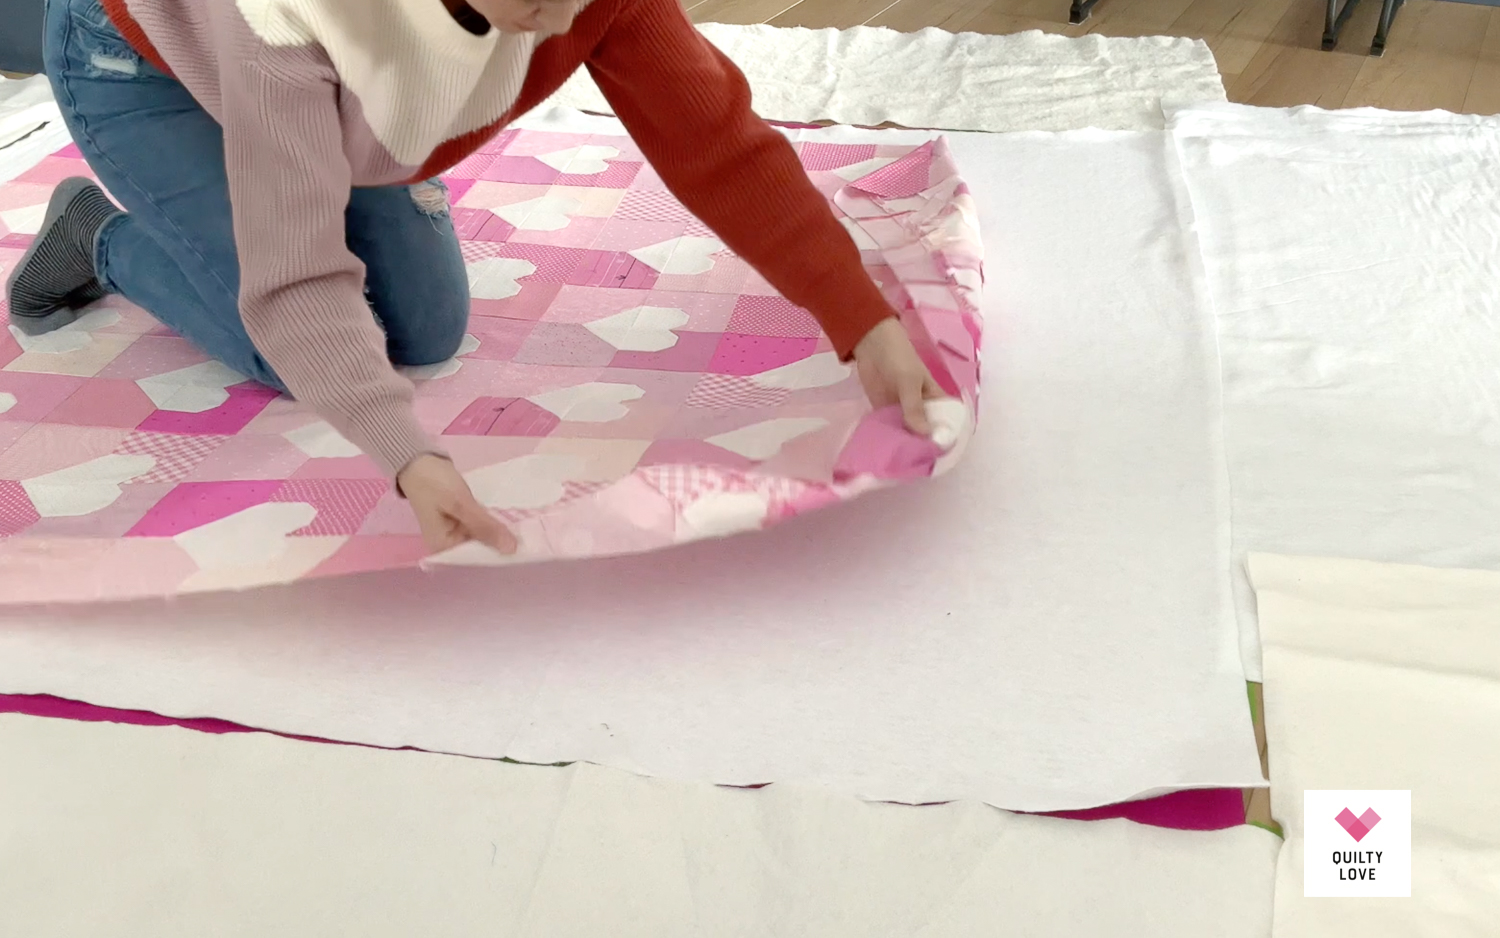
Step Four: Place the quilt top on the batting
Place the quilt top down on top of the batting and backing and smooth into place before you start spraying.
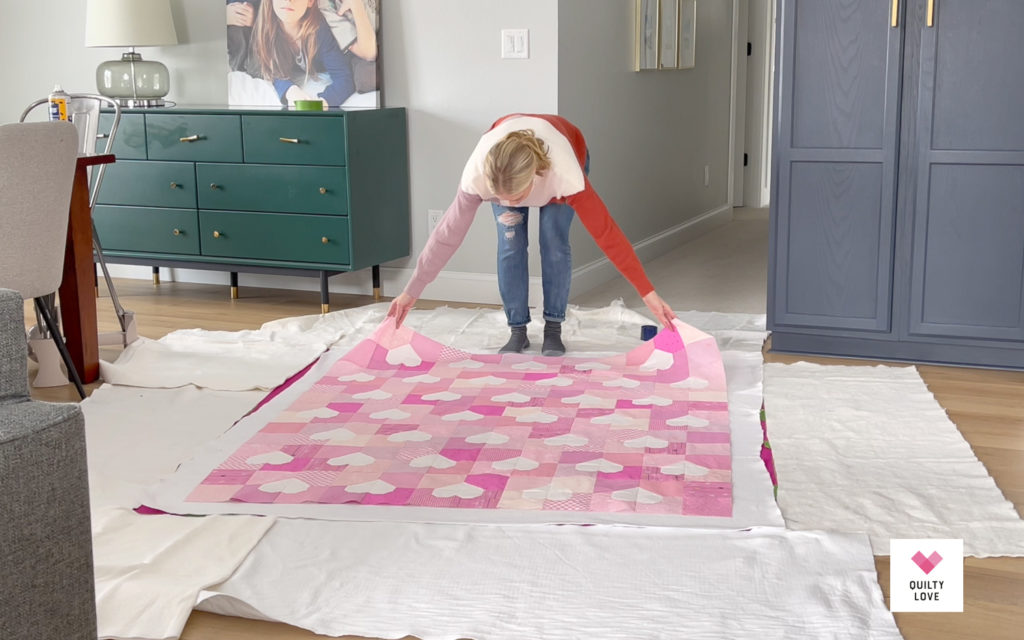
Take the time to smooth it into place so you know how it will be positioned once you start spraying. This will help keep the quilt top straight and nicely centered on the batting.
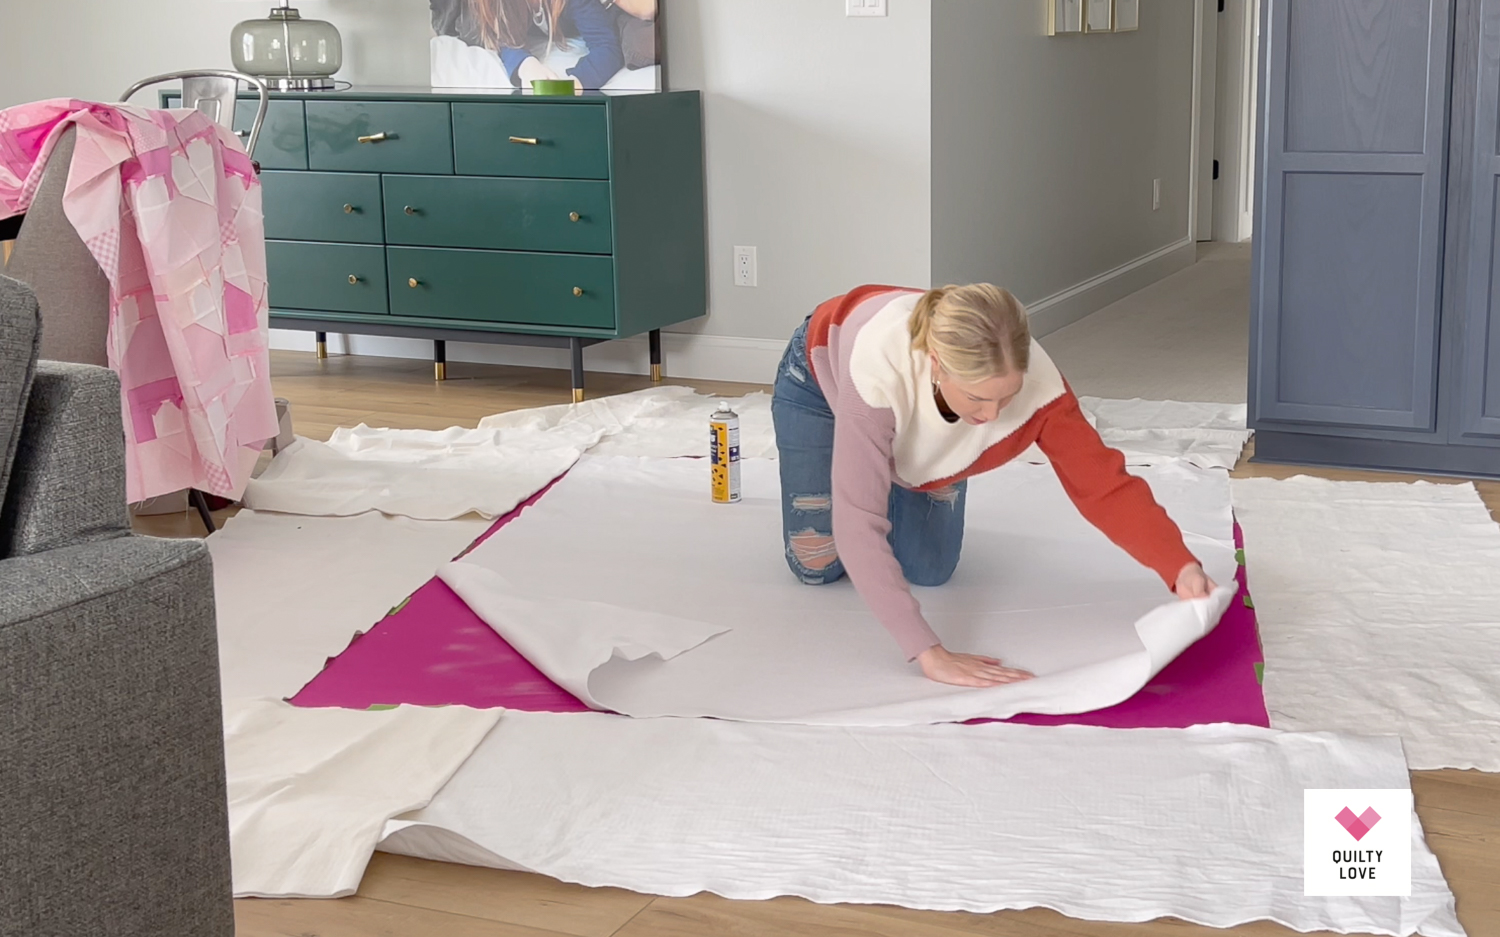
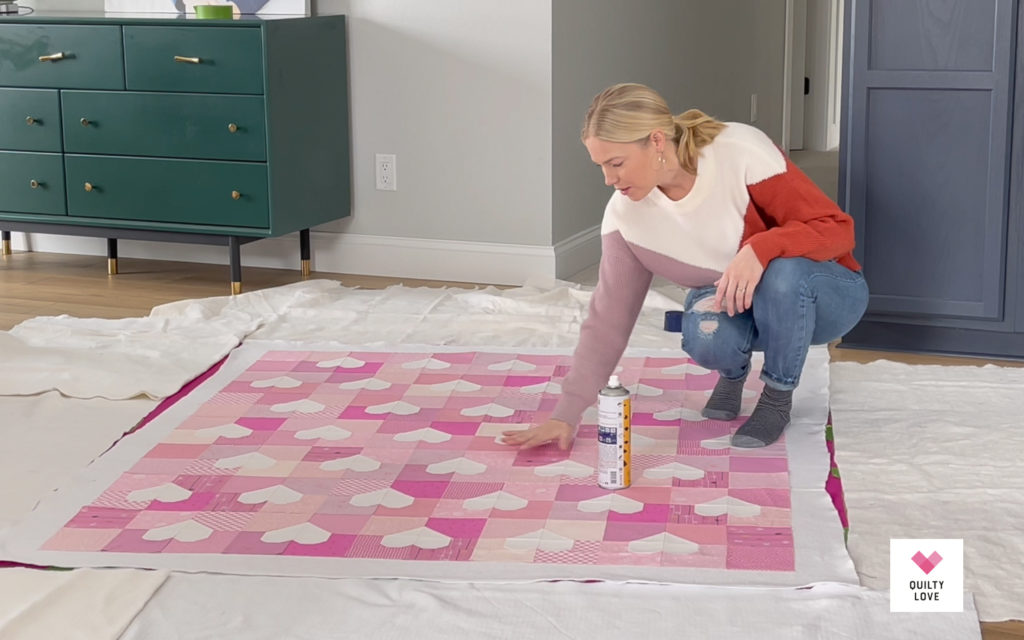
Step Five: Spray baste the quilt top to the batting
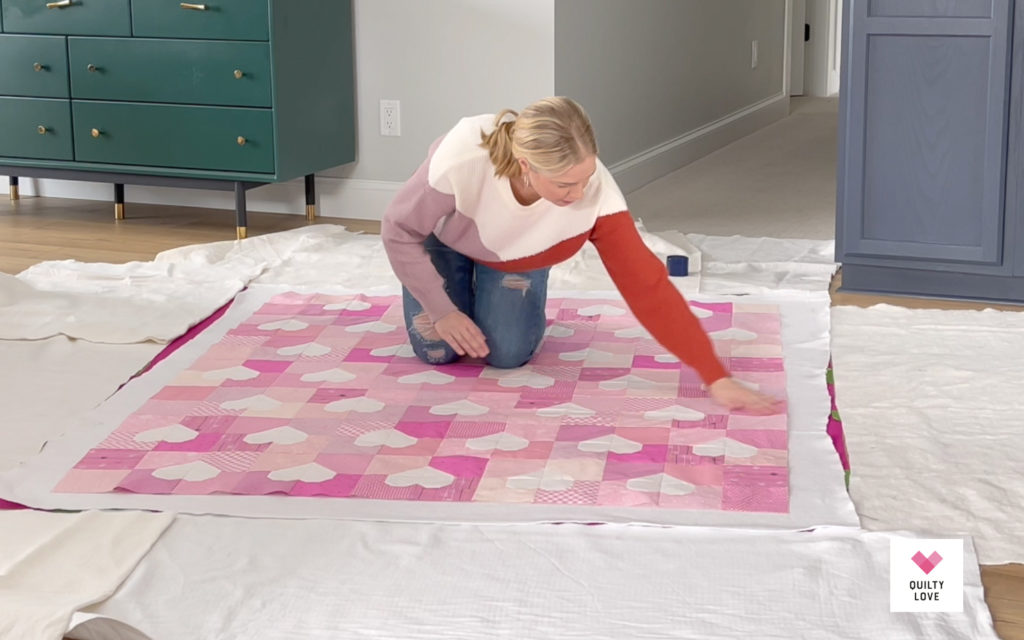
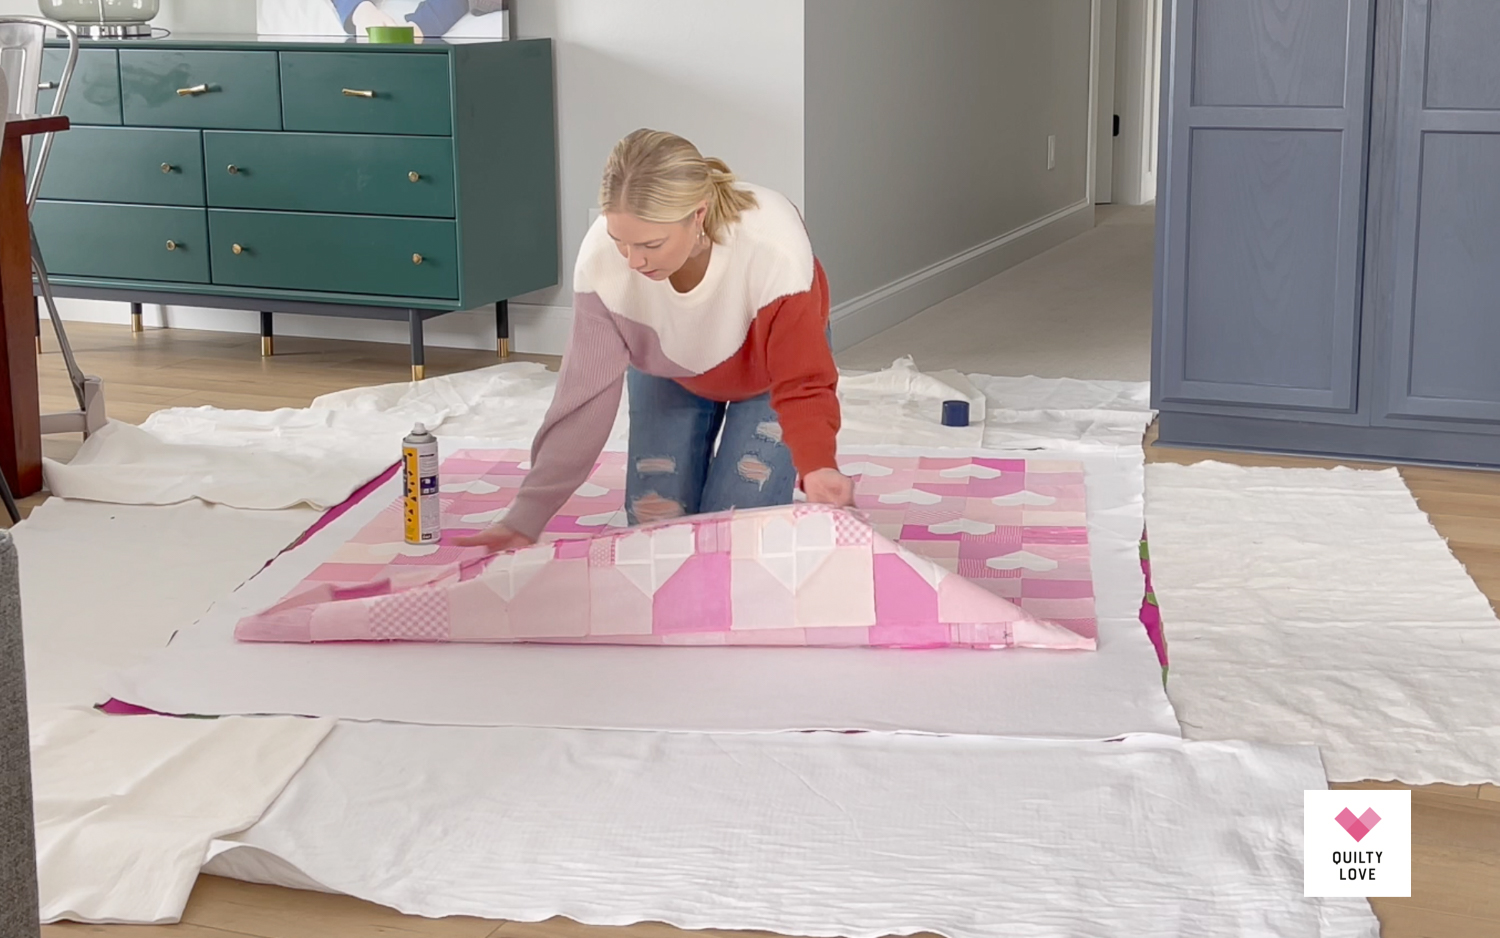
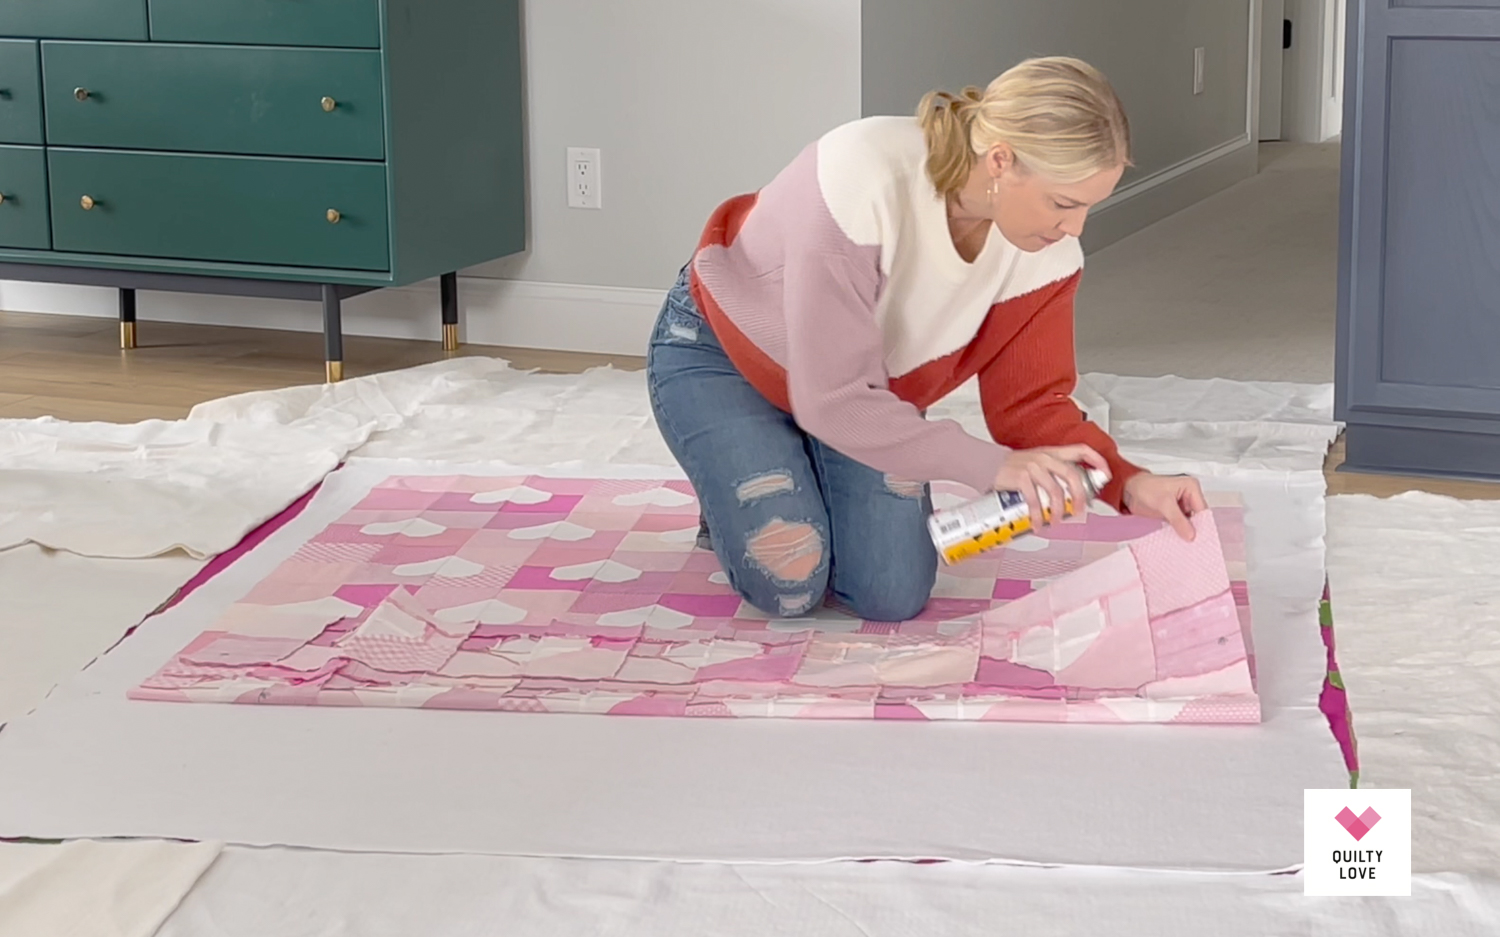
Just like the batting, pull the quilt top back halfway. Begin spraying in sections just like the batting. I usually always spray the quilt top itself for this step.
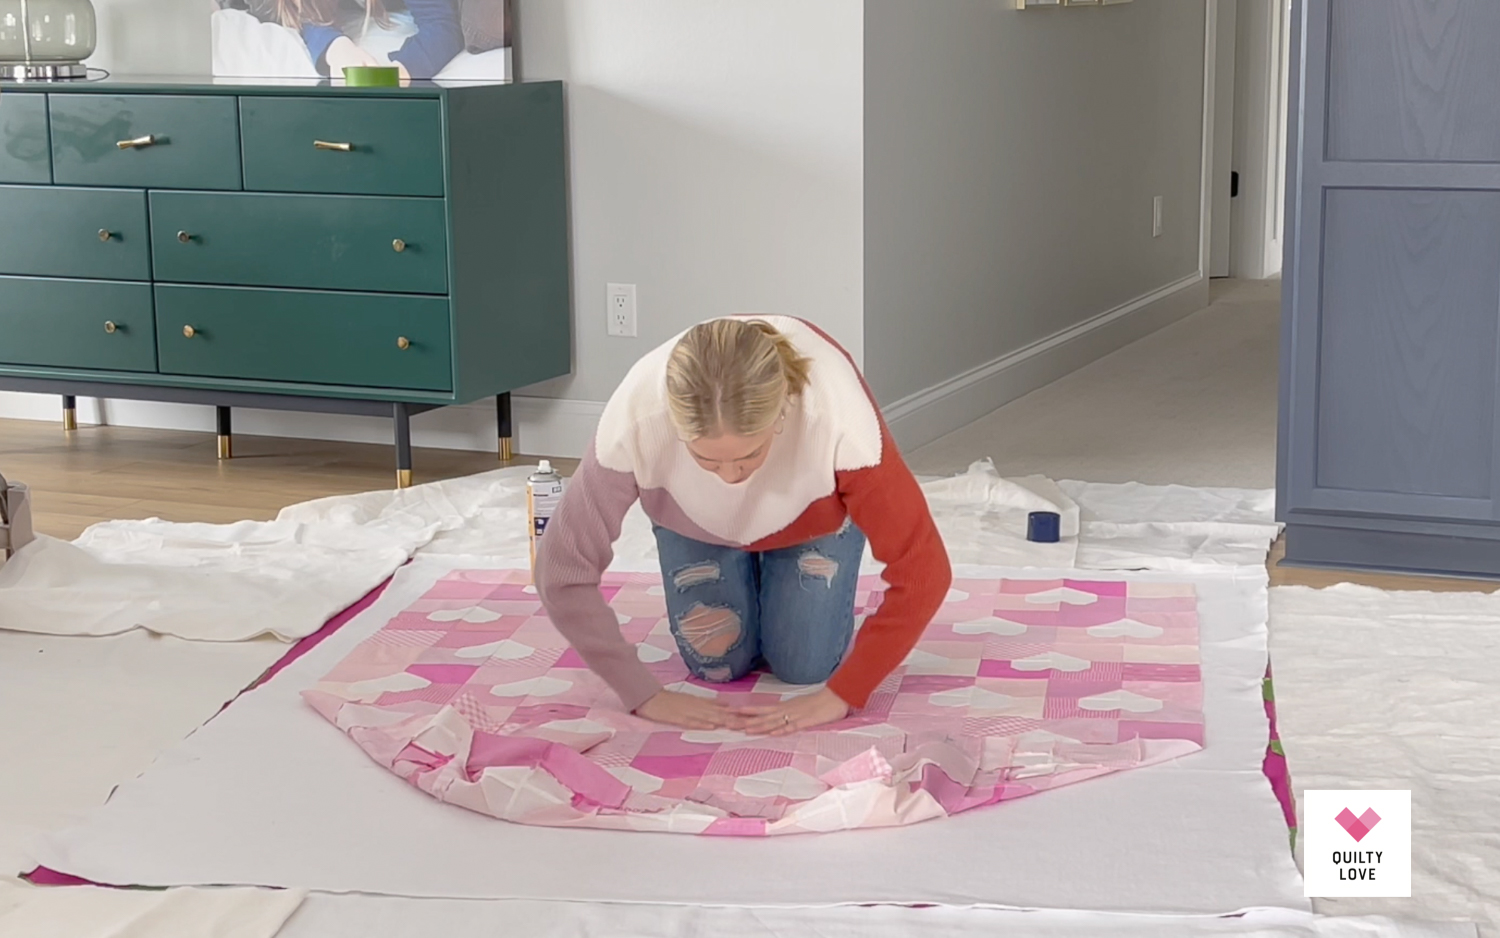
Start by pulling up the center of the quilt top and smoothing into place. Be sure to place it more than pull it. You don’t want to distort it or end up with a wonky quilt top.
Then place and smooth both corners.
Work in sections pulling the quilt top back until you feel it catch where it’s already been glued. Place the quilt top and try to keep it square as you smooth it out.
Watch that your quilt top edges stay straight and your corners stay nice. You can reposition the quilt top as needed.
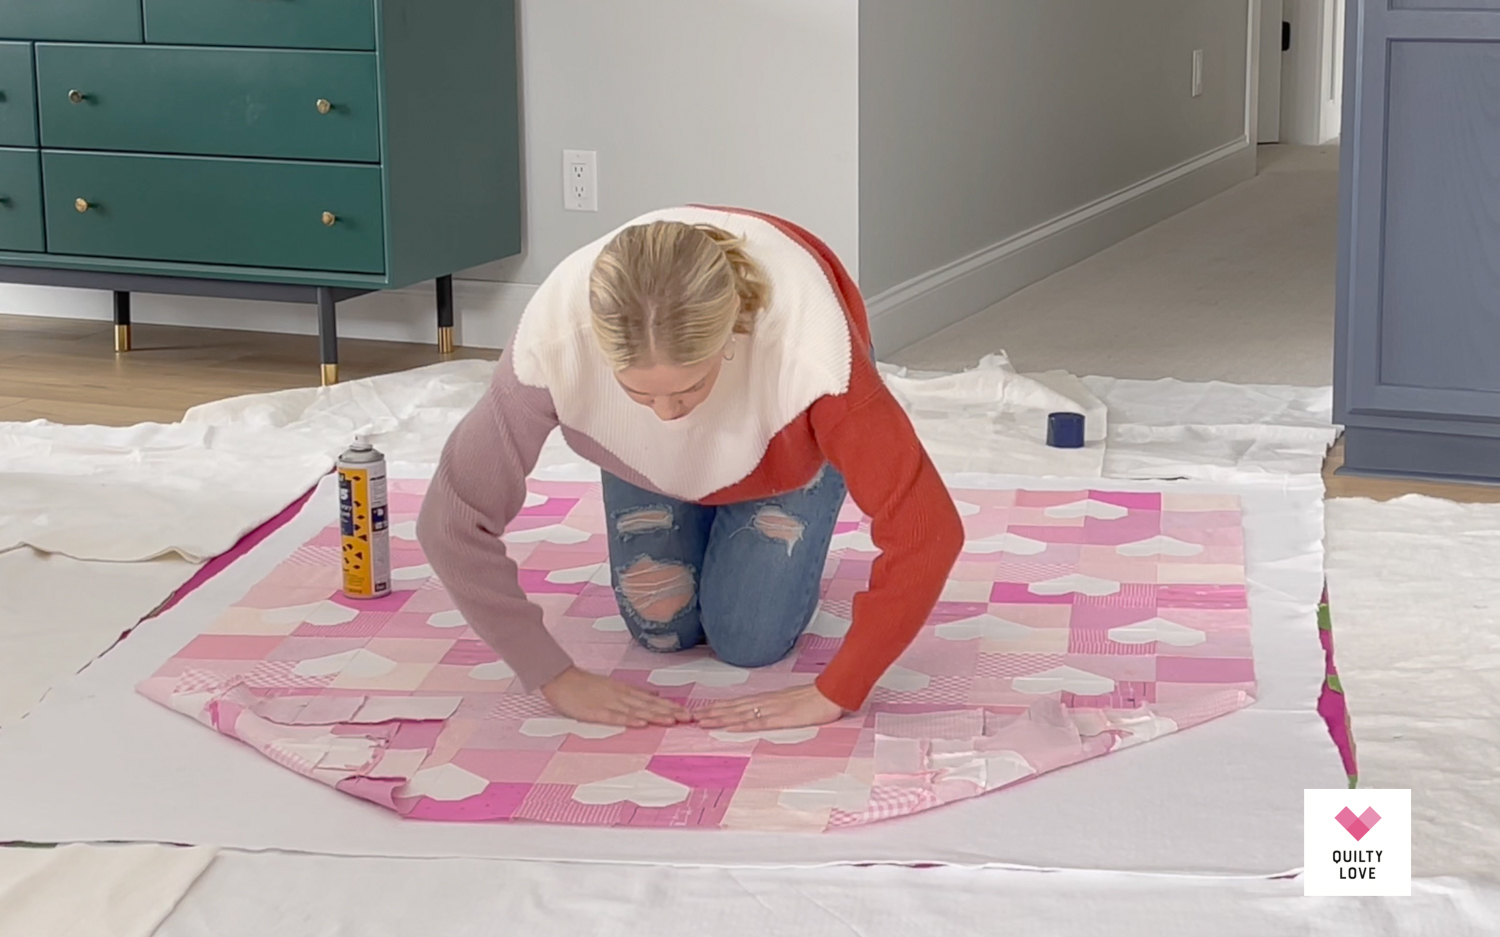
Turn around and repeat for the second half of the quilt top.
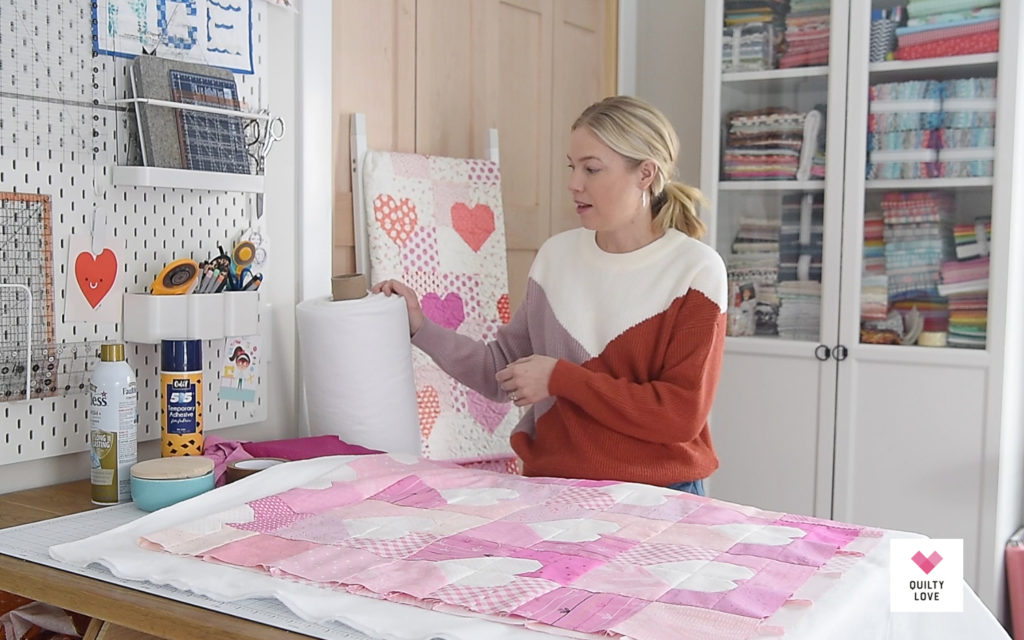
And that’s it!
No pins are necessary and your quilt top is ready for quilting. You can pull it off the floor immediately and start quilting or sometimes I’ll let it sit for a little while to make sure the glue baste dries completely.
Minimize handling of the newly basted quilt top
Once I spray baste a quilt I do try to quilt it right away. I’ve never glue basted and then stored a quilt away to quilt later. At least not more than a day or two. I’m not sure how well the glue baste will hold up over time only because I don’t have any experience with that.
I also try to minimize handling of the quilt once it’s glue basted. If I need to set it away I try to keep it flat rather than fold it up or roll it.
Glue basting a quilt is so quick and easy once you get the hang of it! And I personally have a much smoother finished quilt with spray basting over pin basting.
Spray Basting pros
- So much faster than pin basting!
- Less moving and shifting fabric while quilting
Spray Basting Cons
- It adds a glue substance to your finished quilt
- More expensive than pin basting since pins can be reused over and over
- Best in a ventilated area
- Can leave a sticky overspray to your floor
- Can gunk up your needle – This has never been a problem for me but I hear about it a lot from other quilters
As you can see the con list to spray basting is longer than the pro list…haha. I’m going to be honest with you and tell you I wish I had better luck with pin basting and could go that route. But I don’t so I still prefer to spray baste despite the fact that it comes with the con list.
Spray basting supposedly washes out when you wash your quilt. I will say that I have never noticed the long term difference in any of our quilts when they are spray basted vs when they are not. You really can’t tell the difference so there is a good chance that the spray baste is washing out nicely.
Wait for spray baste to be on sale
Spray baste will be more expensive that pin basting. I can usually spray baste around 3ish quilts with one 12.5 oz can of spray baste. I usually keep an eye on the price of spray baste and then stock up on it when it’s cheapest.
Use drop clothes for spray baste overspray
The spray basting glue can leave a sticky overspray on your flooring so be prepared for that! I didn’t really care so much until we got our new floors…lol. I’ve always found it hard to wash up that overspray so now I use leftover batting pieces as drop clothes and have no problems with overspray.
Does spray baste gunk up your needle?
I get asked this question all the time and it surprises me how much it comes up since I’ve never had an issue with spray baste gunking up my needle. Every once in a while there will be a little spot of build up on my needle but it isn’t leaving my needle sticky and it certainly isn’t affecting the quilting.
I can only guess what is causing this for other quilters and my guess would be using too much spray baste and possibly the brand of spray baste that is being used. The only brand I’ve ever used is Odif 505 and I’ve never had a problem with it.
Choosing a Batting
There are so many different quilt batting options available so I wanted to share a few of my favorites.
My two favorite battings are Quilters Dream Select and Warm and White by The Warm Company. (Both are link to twin size batting which works well for large throws.)
I use 100% white cotton batting when I quilt my own quilts. I have my quilter use an 80/20 cotton/poly blend. I actually like the drape better on the cotton/poly blend so I think I’m going to switch to that at home.
If you are making a lot of quilts, it’s really nice to have a bulk stash of batting on hand. You can purchase batting by the roll and it will last for quite a while. I like to buy a 40 yard roll.
I would frequently buy this Warm and White roll of batting. It’s 90″ wide so it will work for just about any size quilt. It might not be wide enough for some queen and king quilt sizes though.
Batting usually comes white or in a natural color. I’ve used both but if your quilt top has white fabric then a white batting will keep it nice and bright. I have used natural colored batting with white quilt tops and it muddles the white a little so it looks more cream colored. I don’t always mind but it’s something to keep in mind when you are choose a batting color.
I hope this tutorial helps you as you learn how to quilt your own quilts!
Click here to pin this post for later!