How to machine bind a quilt-A beginner friendly method
This free quilting tutorial will teach you how to machine bind a quilt.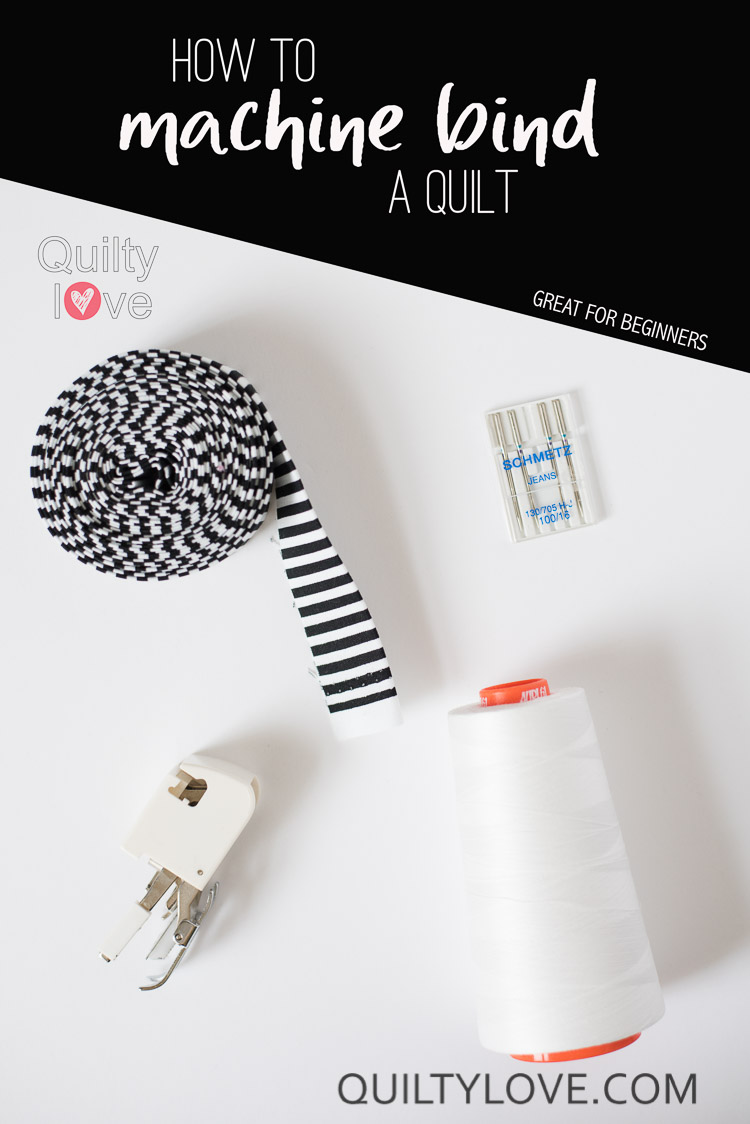
There a many different ways to machine bind a quilt. This machine binding quilt tutorial will walk you through an easy beginner friendly method. Follow the photos or watch the short video clips below.
I attached all of my quilt bindings by machine when I was first learning to quilt. After a year or so I learned how to hand bind and then that became my preferred method. I recently attached the binding on a quilt with my machine and it reminded me how fast and easy it is!
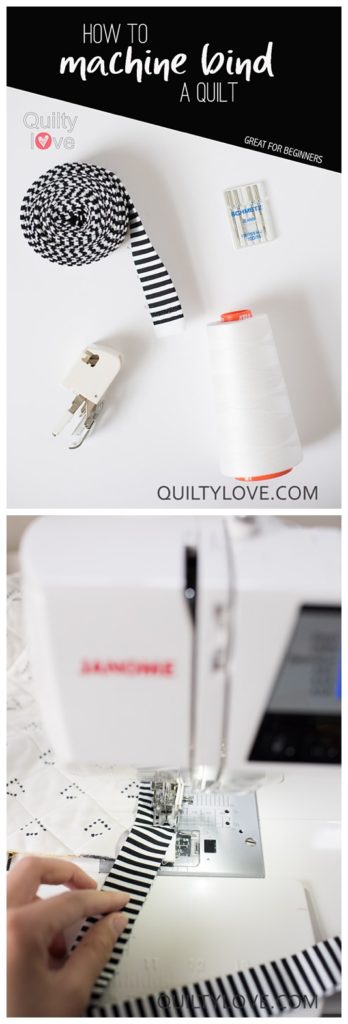
Here’s what you will need to get started:
- A walking foot. I use this one for my janome machine
- A thick needle like this one is helpful.
- Your binding
- A small ruler to measure 1/4in -1/2in
Why machine bind a quilt?
Machine binding is fast! Machine binding will hold up better over time.
There is less worry of your binding coming un-stitched with frequent use and washes when it’s attached by machine.
Make quilt binding
I’m using black and white stripes so I like to attach my strips end to end. No fancy cutting or sewing. I’ve simply sewed my binding strips together to form one long piece of fabric.
Press your fabric in half wrong sides together. This will form a double fold binding which will withstand a lot of wear and tear.
Attach binding to back of quilt
For this quilt binding method we will attach the binding to the back of the quilt first.
Line up the raw edge of the binding to the raw edge of the quilt. I like to start attaching the binding about 3/4 of the way down the long side.
Start sewing 8-10 inches from the end of the binding. You will need that beginning strip loose when joining your pieces at the end.
- Don’t forget to back stitch when starting.
- Sew 1/4in from the edge using a walking foot.
- Use a heavy needle (like this one) if stitches are skipping.

Navigating the corners
Accurate corners will make all the difference in your finished quilt. It takes practice to get those nicely mitered corners. Here is how I achieve sharp corners:
- As you approach a corner, stop stitching 1/4in away from the corner. I measure 1/4in with a ruler and mark it so I can see the line I need to stop at. I stop a few stitches before the mark and back stitch.
- At this point you can remove the quilt from your machine.
- Rotate the quilt to the next side.

- Fold the binding up at a 45 degree angle. The raw edge of the binding should stay in line with the raw edge of the quilt.
- Fold the binding back down keeping the folded edges in line.
- The fold should line up perfectly with the corner of the quilt.
- Holding the fold down, sew down the edge. I like to start almost 1/4in in from the corner.


Continue sewing around your quilt repeating this step for each corner. Stop sewing when you are about 8-10 inches from the start of the binding. Don’t forget to back-stitch.
Watch the video below to see these steps in action.
Join the ends of the binding
In this method to machine bind a quilt you will join the ends of your binding for a seamless finish. You won’t be able to see where your binding starts and stops.
- Trim one of the binding tails to the halfway mark on your quilt.
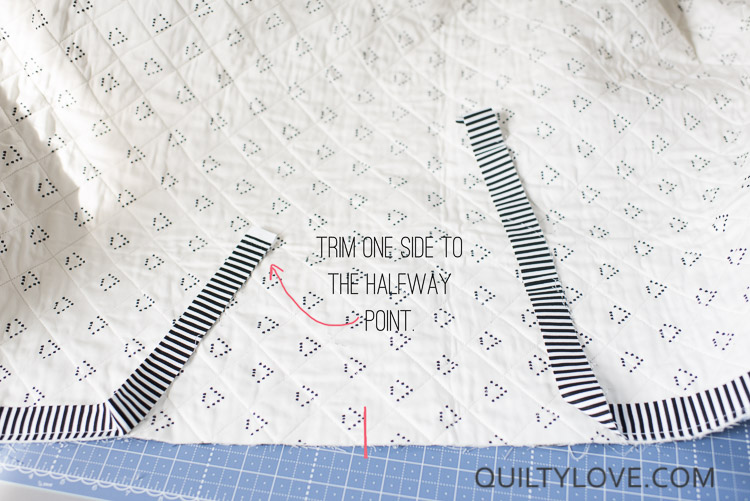
- Overlap your binding.
- Using a ruler, mark 1/2in past the trimmed edge and cut on this mark. MAKE SURE YOU ARE CUTTING 1/2in PAST THE CUT TAIL.
- Join your two sides together with pins and sew using a 1/4in seam allowance.
- Finger press the seam open.
- Finish attaching the binding to the quilt back.

Watch the video clip below to see these steps in action.
Attach binding to front of quilt
Now that the binding is in place on the quilt back, it’s time to attach it to the front. I like this method because you can watch where you are stitching and it leaves the quilt front looking tidy and neat.
This machine bind a quilt method will leave a visible stitched line around the back of your quilt so use a bobbin thread that matches the quilt backing and a top thread that matches the binding.
I like to start about 18 inches from the bottom corner. Start by flipping the the binding over to the front of the quilt. Pin or clip into place. I don’t use many pins and use my hands to hold the binding in place.
I like to use the edge of the binding as my guide and follow right down the center of it with my presser foot. To do this, bump your needle over to the right about 2-3 stops. You can then follow the edge and your stitch will be just inside the edge.
Don’t forget to back-stitch when starting.


Click on the video below to see these steps in action:
Mitering the corners
Finishing off the corners is the trickiest part of machine binding the quilt! Practice makes improvement! Don’t be discouraged when they don’t turn out perfectly! It takes practice. I’ve made over 100 quilts and I still get funky corners every once in a while.
- Stitch up to 1/4in from the corner of the quilt.
- Back-stitch and remove quilt from machine.
- Fold corner over and pin in place.
- Rotate quilt and stitch down the next side. Repeat for each corner.
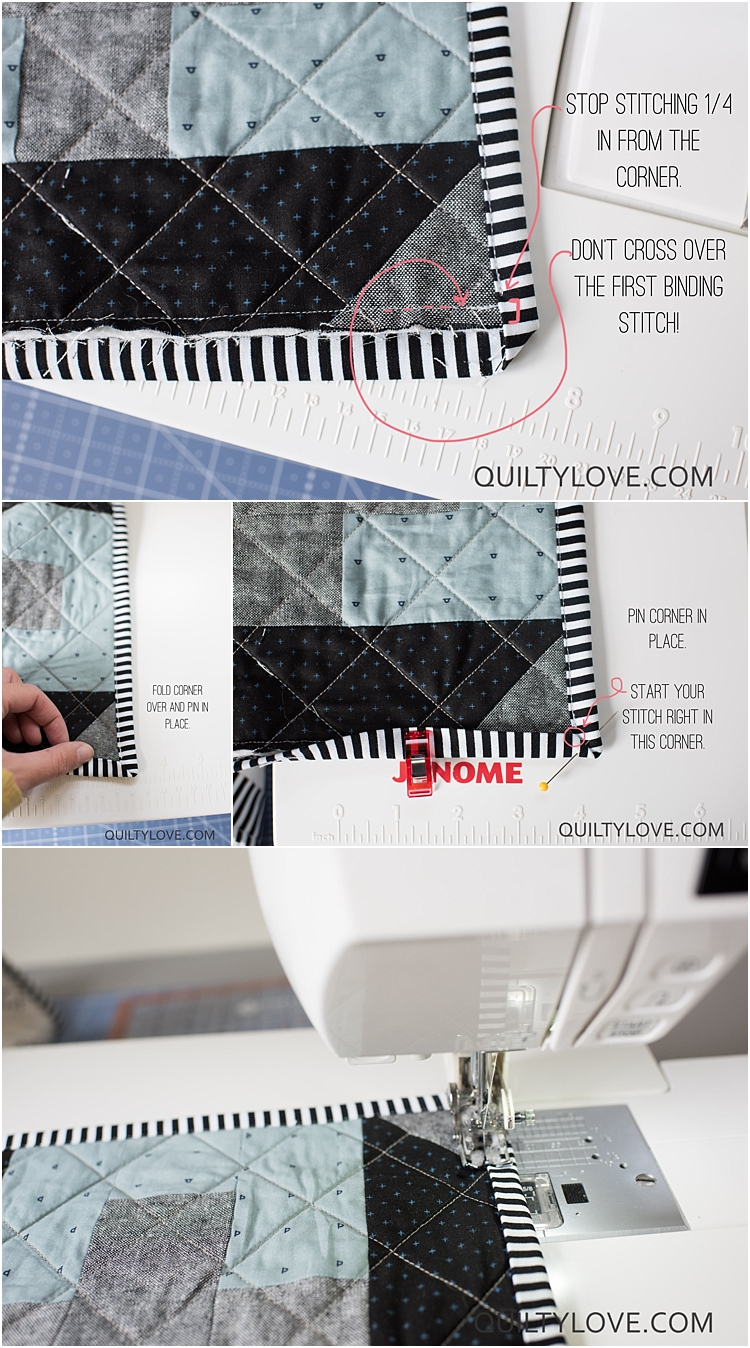
Continue stitching the binding all the way around the quilt. Back-stitch in place where you finish.
Click on the video below to see these steps in action:
Trim your loose threads.
This is a good beginner friendly quilt binding method as you can see exactly where your stitches are going. Every once in a while you may cross over onto your binding on the back of your quilt. No big deal! Making sure you are folding your binding past your original stitch line will help.
Tips to machine bind a quilt
Here are some tips for better binding results:
- Use a walking foot
- Slow and steady is best
- Use a wider binding strip such as 2.5in.
- Use a larger needle to prevent skipped stitches.


Materials used:
Cotton and Steel quilting cottons
Essex Linen in Black
Binding is Timeless Treasures black and white stripe
Backing is a Target Sheet
Thicker needles
Aurifil Thread
Walking foot